
Among the common challenges that WooCommerce sellers face are the ever-fluctuating prices of components or ingredients used to make some of the products they sell. This forces them to manually increase/decrease the price of all the products that use the components or ingredients whose prices have been increased/decreased.
If you sell hundreds or thousands of items on WooCommerce, manually changing the pricing and markups for each product could take hours or even days. However, with tools like Markup for Woocommerce by WPIron, you can implement price changes by category, attribute or any other similarities that your products share. This will save you hours of your time you would otherwise waste if you had to manually make these changes.
This guide will discuss everything you need to know about product markup for WooCommerce websites and how you can use Markup for WooCommerce to make the process easier and more seamless. Without any further ado, let’s jump right in.

Markup for WooCommerce
The easiest way to markup your products in WooCommerce.
What is markup?
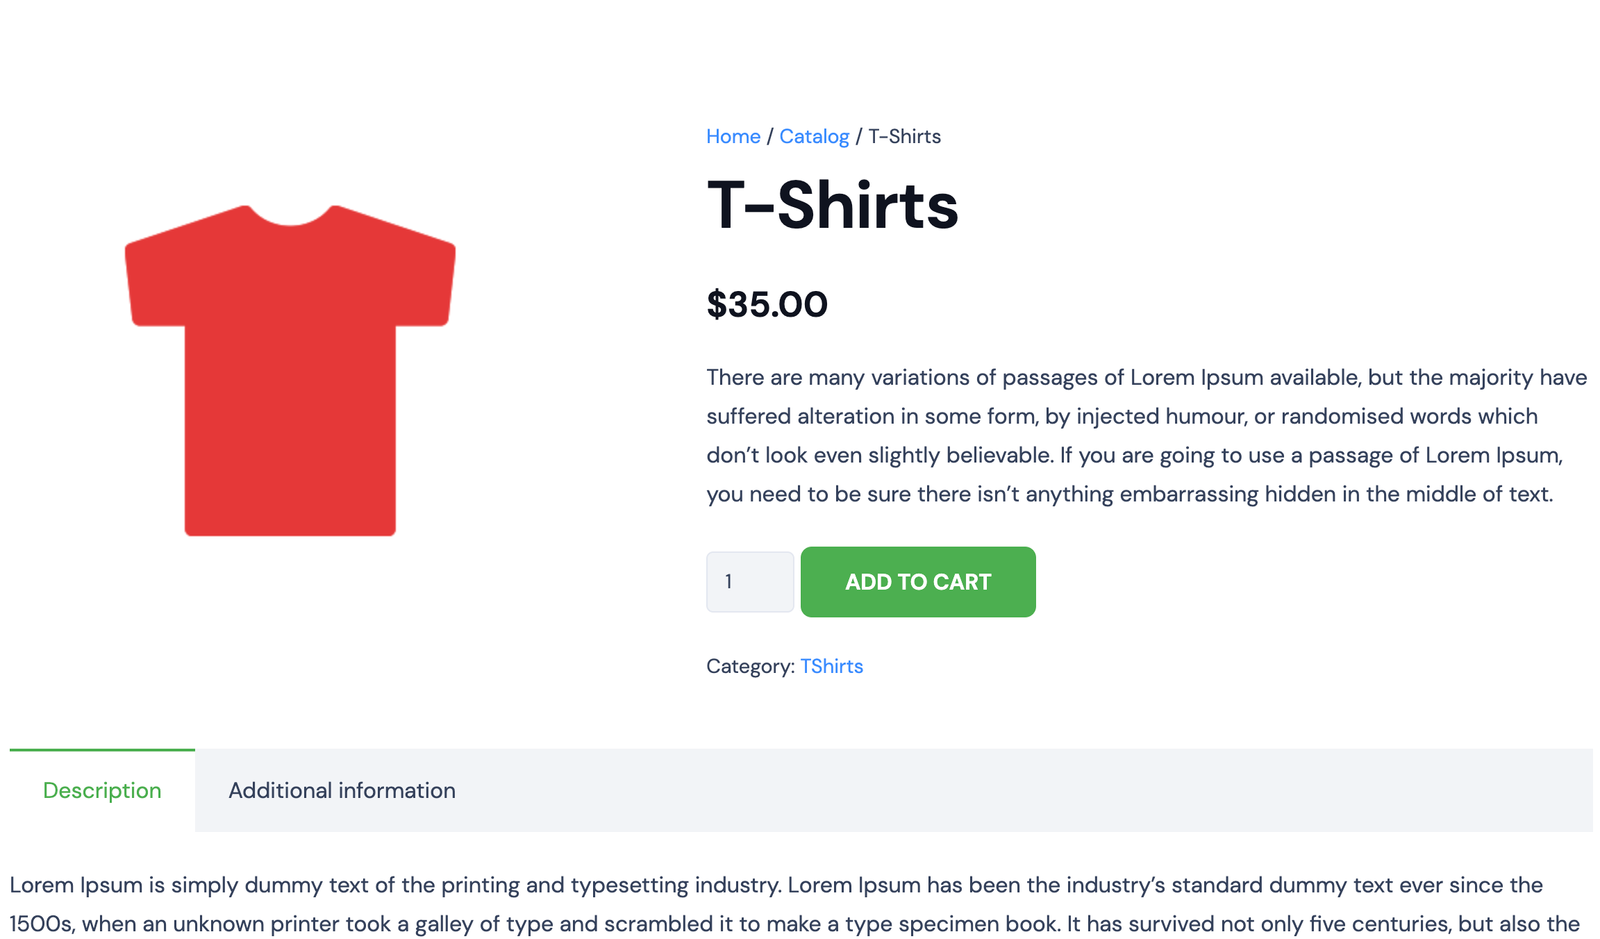
Markup refers to the difference between the selling price of the product and the cost of purchasing it as a percentage of purchasing cost. For example, if you purchase a t-shirt at $20 and sell it at $25, the Markup = (($25-$20)/$20)*100 = 25%. That means to get a gross profit of $5 on each shirt requires a markup of 25%.
Why is price markup necessary in WooCommerce?
The main reason why price markup is necessary is due to the ever-changing costs involved in purchasing, processing (if applicable), and selling the products you sell on your WooCommerce website. For instance, if you sell custom-built PCs on your website, a change in the prices of RAM or storage drives would affect your profit margin if you don’t adjust the prices.
It is nearly impossible to operate an eCommerce website for months or weeks without making a few changes in the prices of certain products. The changing dynamics in the market will always force you to change your prices to avoid making losses or losing customers due to high prices. At times you may have to reduce your prices to stay competitive in the market.
How to markup your product prices on a WooCommerce website?
You can either markup your products’ prices by manually inputting the markup for each product or automating the process using tools like Markup for Woocommerce. As we saw earlier, inputting markups manually is time-consuming, so it is not the most efficient process, especially for online stores that sell hundreds or thousands of different products.
Besides saving you time, using a plugin like Markup for WooCommerce minimizes your chances of making errors while implementing the changes in prices for your products. Let’s look at all the features of Markup for WooCommerce that make it one of the best plugins for implementing price markups on your eCommerce website.
Markup for WooCommerce Features
How to markup, value to your products on WooCommerce website?
Now that we know the features that make Markup for WooCommerce one of the best WooCommerce plugins, let’s find out how to install and use this plugin on your online store.
Step 1: Installing Markup for WooCommerce
The procedure for installing this plugin is very straightforward. While on the Markup for WooCommerce home page, click the Buy Now button in the top right corner of the screen. You will be redirected to the pricing section of the plugin, where you can choose between the annual or lifetime plan for both businesses or agencies. If you intend to use this plugin on more than one website, it is best to choose the Agency plan (annual or lifetime).
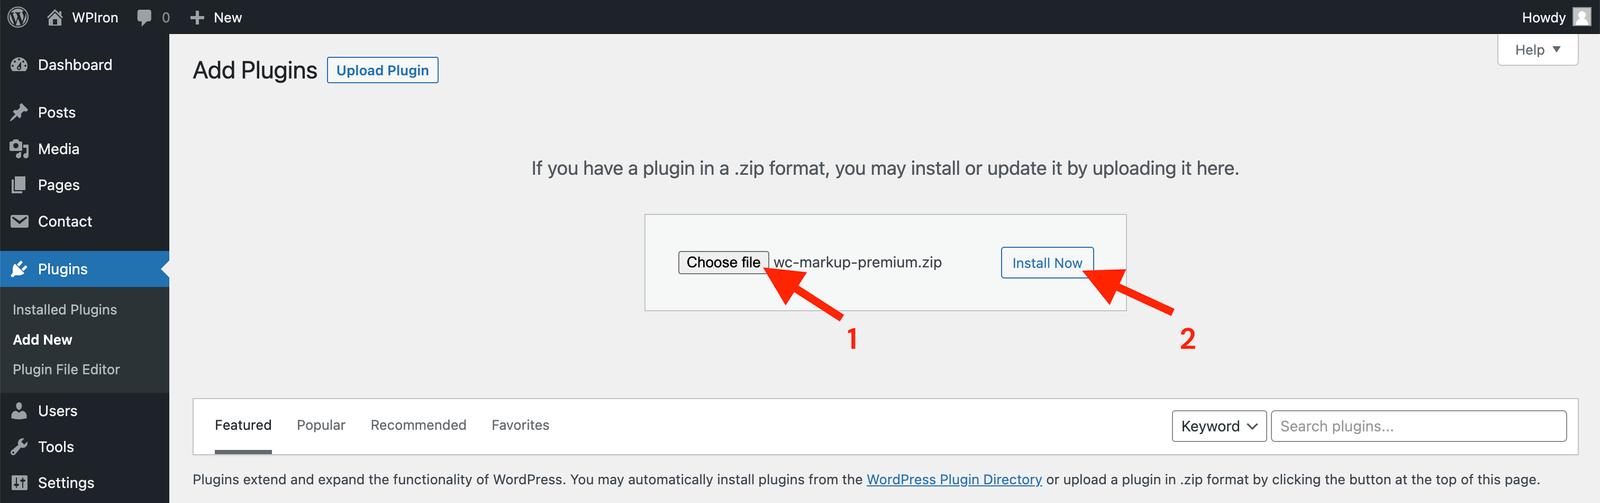
Then follow these steps:
- Go to Plugins → Add New → Upload Plugin.
- Choose the zip file you downloaded, upload it, and then click Activate.
- Enter your license key to activate the plugin.
Now that you have Markup for WooCommerce installed, you can move onto using WooCommerce to add an markup to a product, category, attribute or etc.
Step 2: Create your first markup
In this example, we’re going to add a percentage markup (10%) to an existing WooCommerce product. Navigate to Products → All Products and edit a product of your choosing.
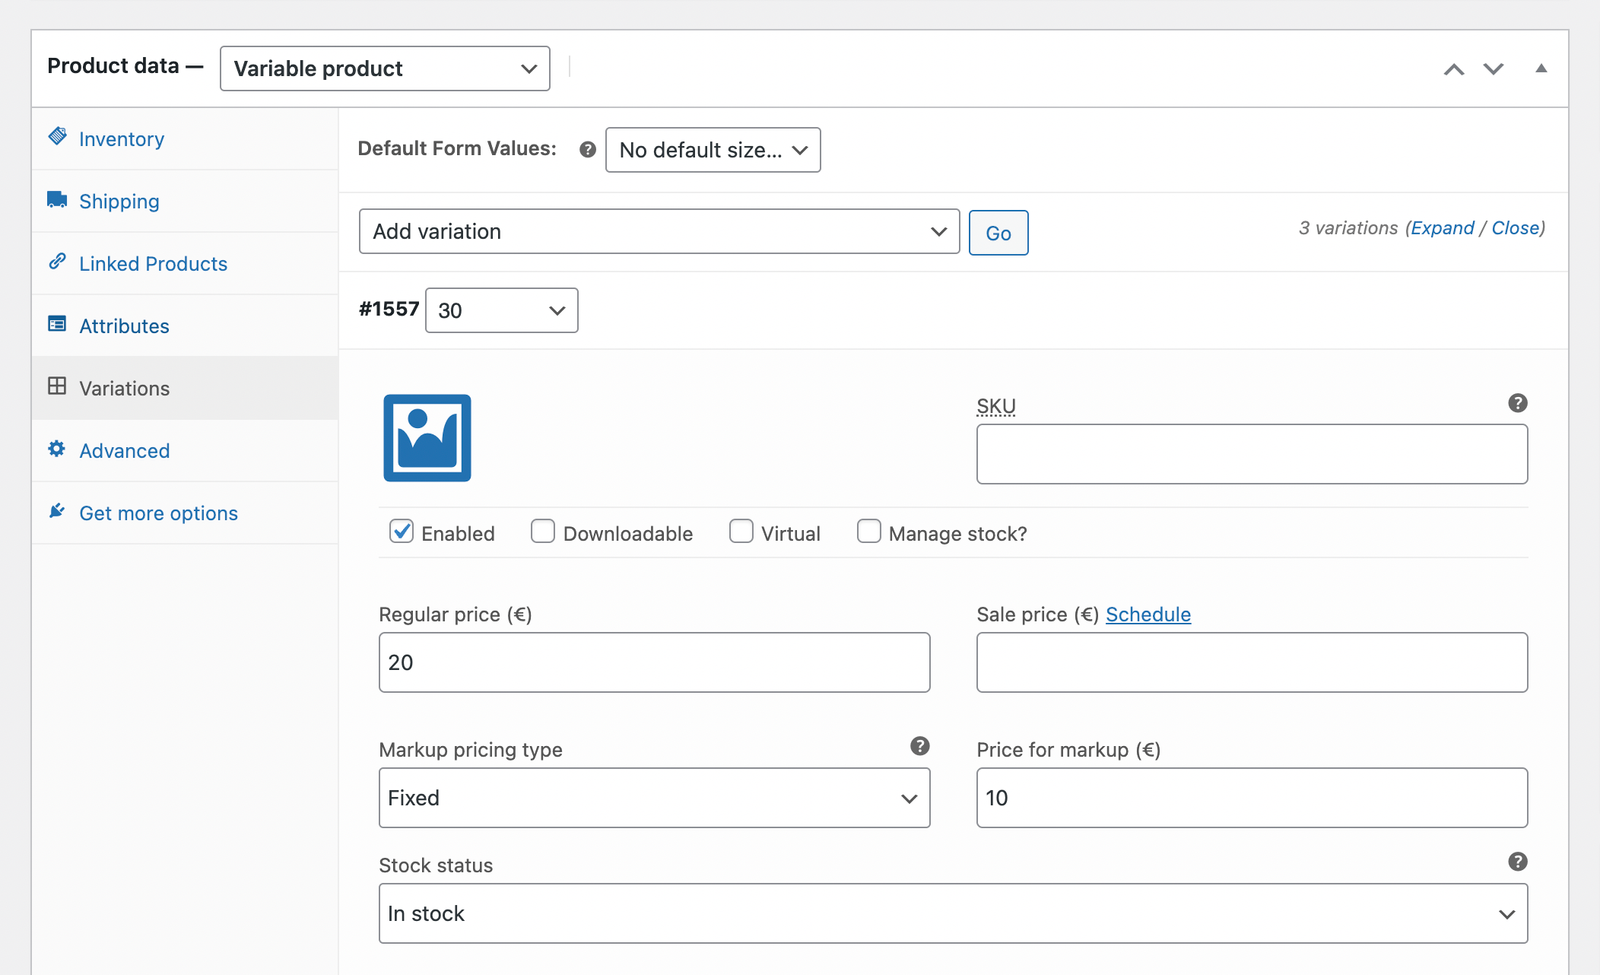
Find the Markup section inside the Product Data box:

Click on Markup Pricing Type and select the markup type that fits you. Then enter the value.
We’ll go through the most important settings here:
- Fixed: create a fixed value price markup (example: $10)
- Percentage: create a percentage value price markup (example: 10%)
Once done, simply Update your product by scrolling up to the Publish section of the product. Now you can check out your product page.
You can create markups on variable products, categories attributes.
If you have several products with similar attributes, you can implement their price markups with just a single input. For instance, if you are selling shirts made of different materials such as cotton, silk, or nylon, you can decide to create different markups for each of these materials.
Why choose Markup for WooCommerce
Markup for WooCommerce Pricing
It has two packages; Business and Agency
Business
$45
/ year
- Use on 1 site
- Plugin updates
- Email support
- All plugin features
Yearly subscription, cancel anytime.
Agency
$199
/ year
- Use on 20 site
- Plugin updates
- Priority Email support
- All plugin features
Yearly subscription, cancel anytime.
Business
$199
/ one time
- Use on 1 site
- Plugin updates
- Email support
- All plugin features
Agency
$599
/ one time
- Use on 20 site
- Plugin updates
- Priority Email support
- All plugin features
All the above packages also come with a 14-day money-back guarantee that you can take advantage of if you don’t like the experience of using this tool. This should assure anyone worried about Markup for WooCommerce not having a trial version.
Final thoughts
We hope this article has helped you learn more about Markup for WooCommerce by WPIron and its capabilities. If you have been searching for a plugin to help you easily create and change prices for your products, Markup for WooCommerce is one of the best options on the market. It is well-priced, comes with several useful features, and also seamlessly integrates with WooCommerce settings, enabling you to make all changes to your product catalog from one place.
Markup for WooCommerce
The easiest way to markup your products in WooCommerce.