
Complete Guide
How to Simplify WordPress Security Updates
Have you ever wondered what exactly a website header is? It is the first thing the website viewers see when they get inside your WordPress website. If you wonder why it is so important, the website header includes all the important information of your website. such as the site logo, site title, WordPress menu, and other navigation options. Learning how to edit the header in WordPress is important for creating a professional-looking website and here is the fun part if you do it the right way its easier than you think.
In this guide, we will provide you with multiple methods on How to Edit Header in WordPress and create the perfect header for your entire site.
What is WordPress Header?
A WordPress header is a dedicated section at the top of your webpage that provides the information, like the site title, site logo, and all other necessary navigation links. The location of the website header is at the top of the website.
Here are some reasons for the importance of the WordPress header on your website:
- Provides identity for your website or business and helps users with guidance and navigation.
- If customized properly, it can improve user experience and also perfectly reflect your brand style.
- If you have a well-designed header, it attracts the attention of visitors.
- From an SEO perspective, by incorporating relevant keywords into the site title and navigation links, you can improve search engine rankings and attract more organic traffic.
Moreover, Your website header consists of various elements, which are listed below:
- Site logo or site logo block
- The site title block and tagline
- The navigation block for your menu
- Social media icons
- Search functionality
Although most WordPress themes already have their default header, the fun part is to customize it to match your brand idea and identity.
Understanding WordPress Themes
Before we start understanding WordPress Header, let’s have a quick look at WordPress Themes. Most WordPress themes are of two types: block themes or classic themes. This is important because it differentiates which tools or methods we should use.
How to Edit Header in WordPress Using the Site Editor
The WordPress site editor is by far the most powerful tool that helps you to customize your website header. For the website owner using block themes, here are some steps you should know:
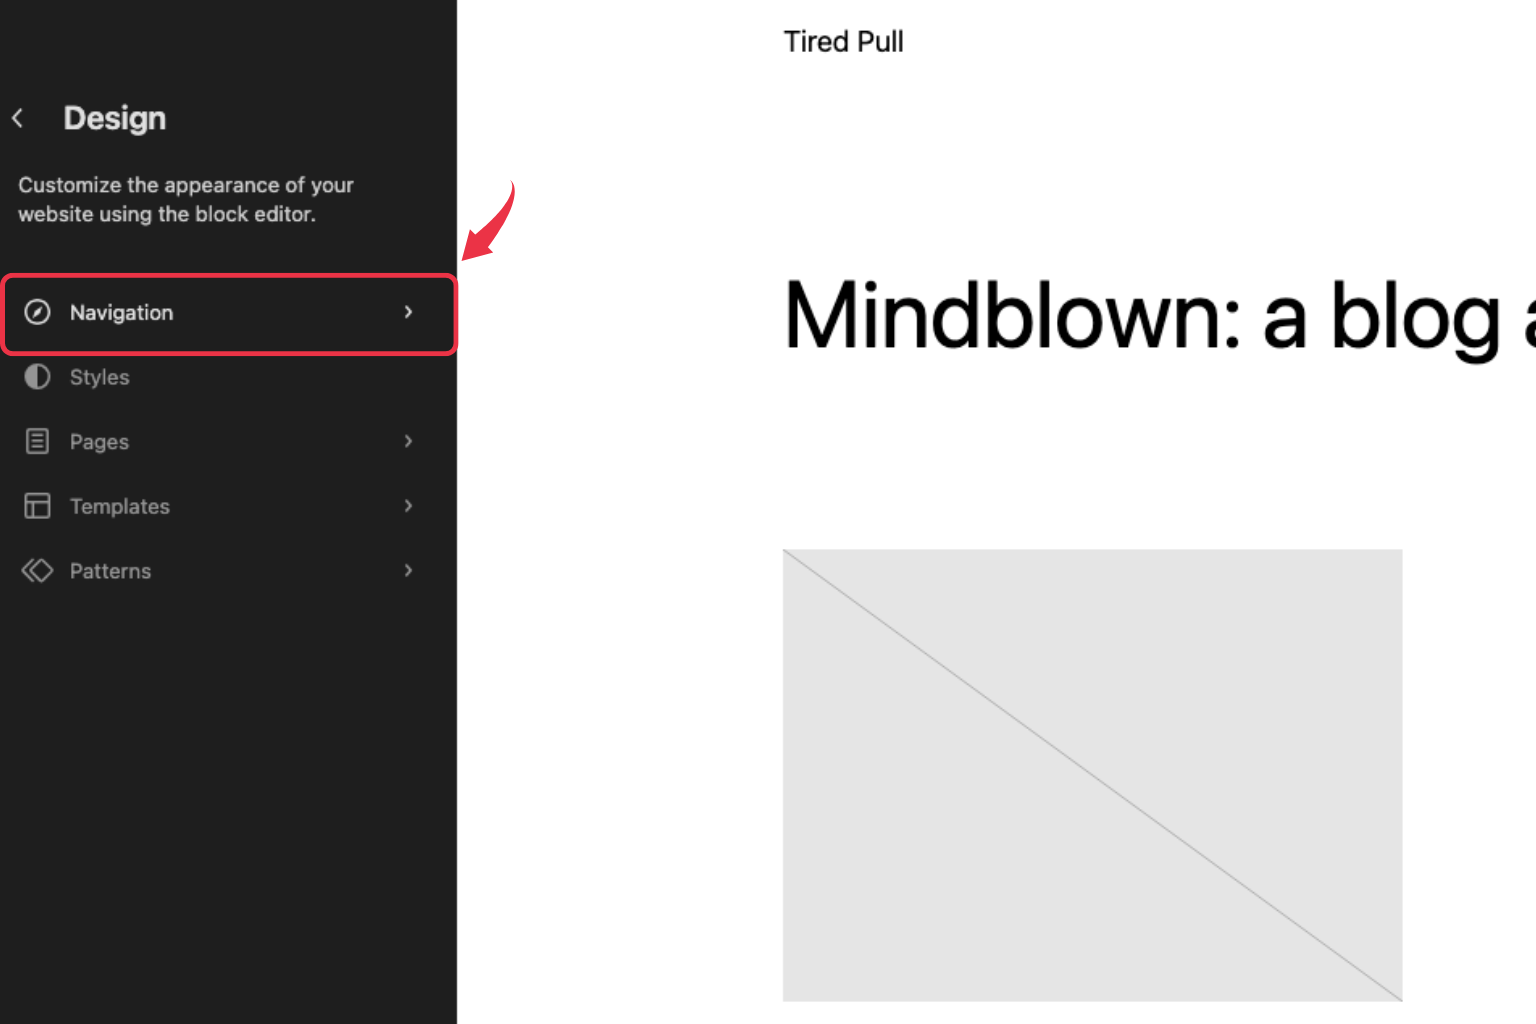
Step 1: Access the Site Editor
- Log into your WordPress dashboard.
- Navigate to Appearance » Editor from the left sidebar.
- You’ll see your site displayed in the block editor interface.

You can look at the left corner at the top section, where you will find the navigation options. Here you can control your template part; this also includes your header.
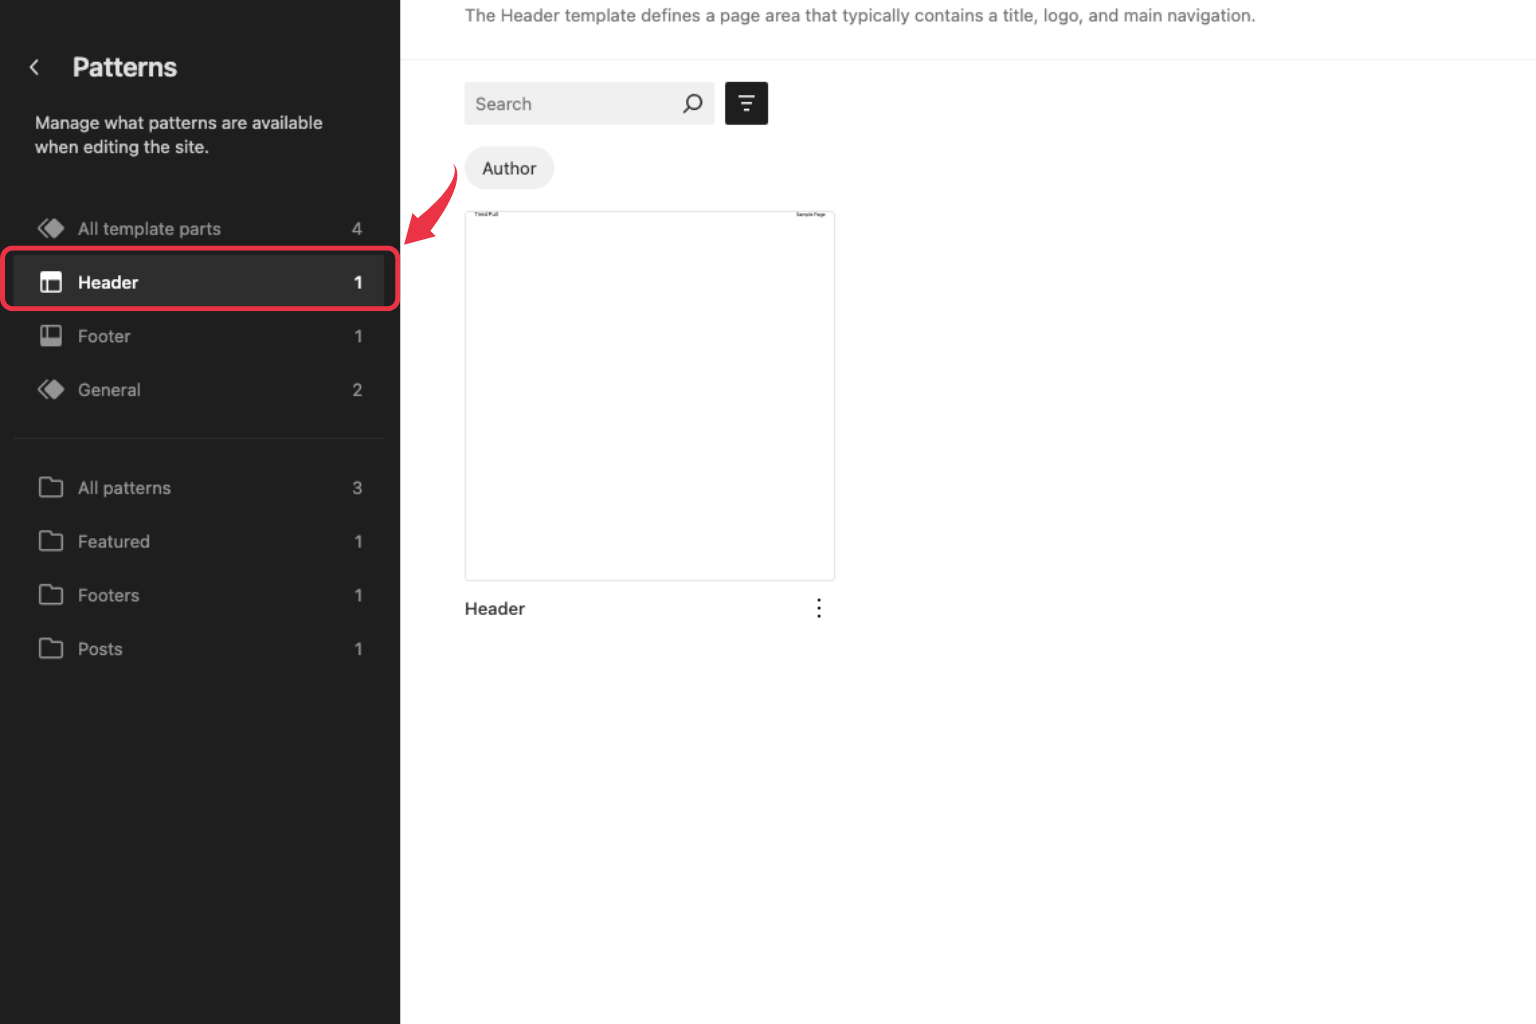
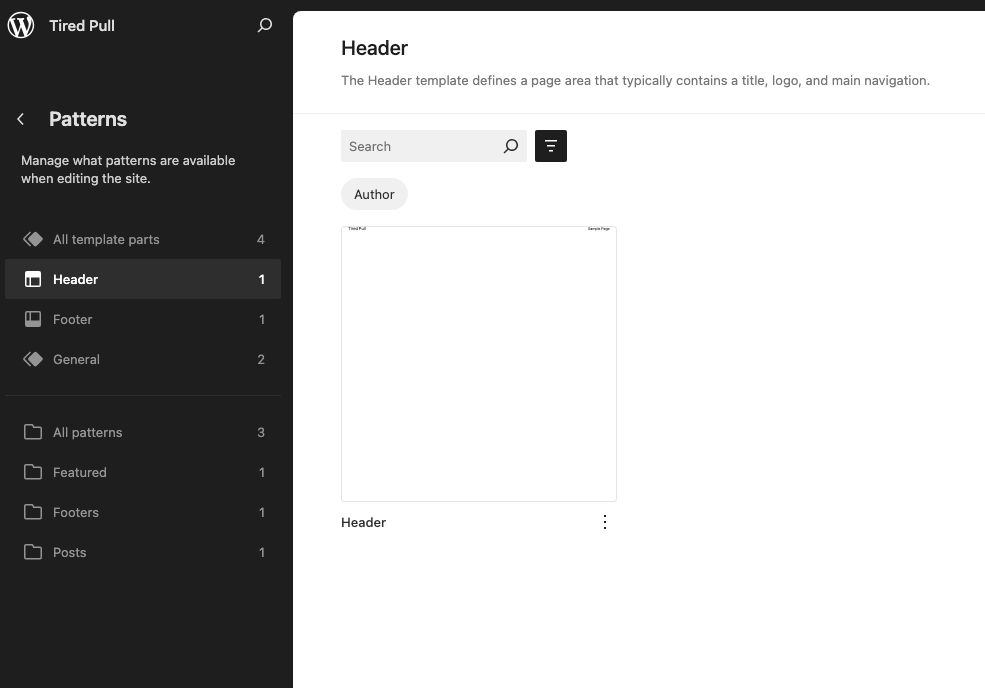
Step 2: Locate Your Header Template
- Click the WordPress icon or list icon in the upper left corner.
- Select Patterns to browse the patterns tab

- Alternatively, click directly on your header area at the top of the page.
- You’ll see the header template part highlighted.
Step 3: Edit Header Elements
Now it’s time for the exciting part. You can click on any element in your header to make edits.
To change your site logo:
-
- Click on the logo block.
- Select “Replace” from the toolbar.
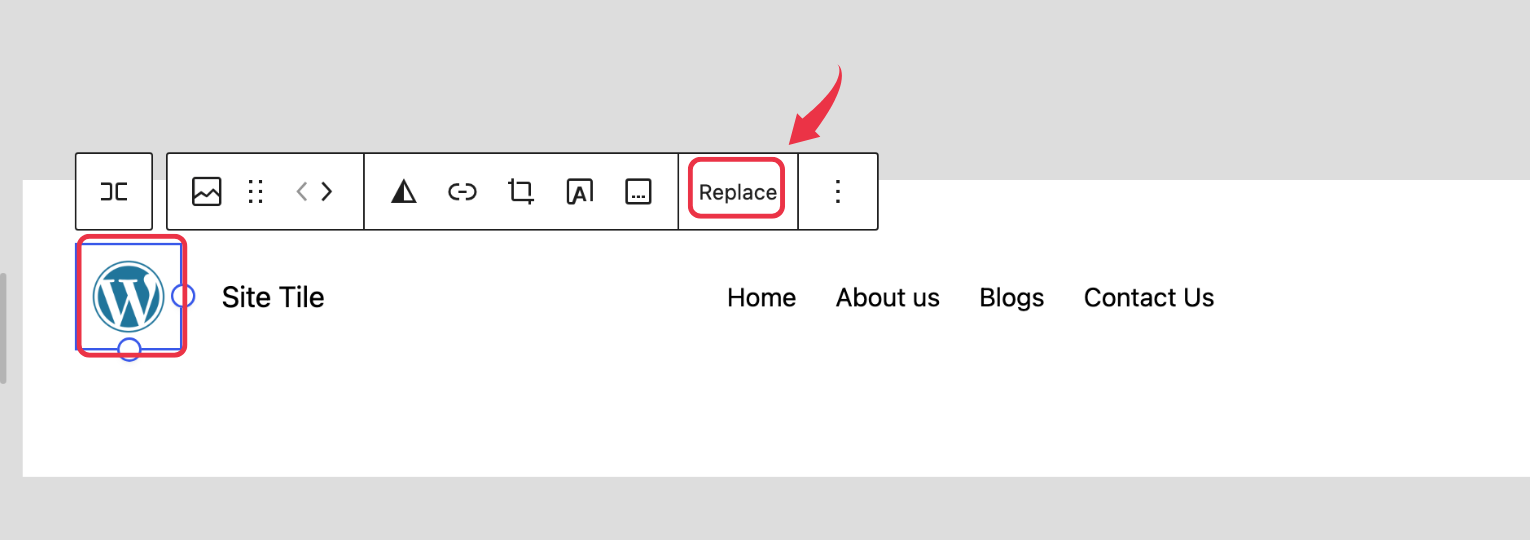
- Upload a new image from your media library or choose an existing image.
- Adjust the logo size using the width controls in the right sidebar.
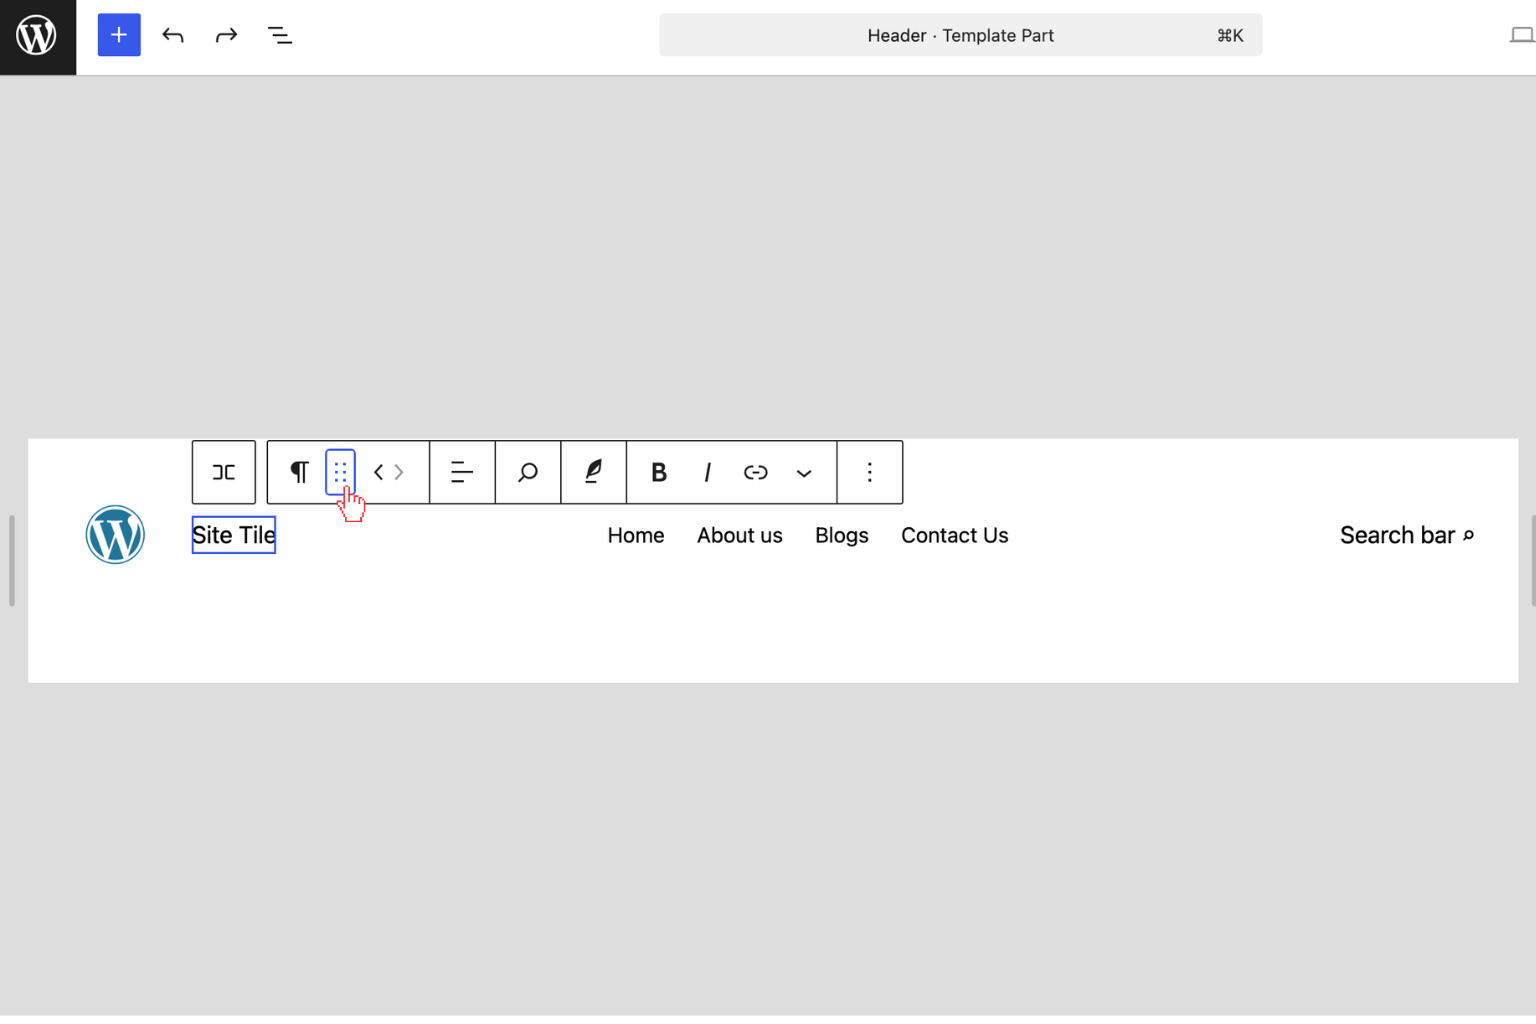
To modify your site title:
- Click on the site title block.
- Edit the text directly or link it to your home page.
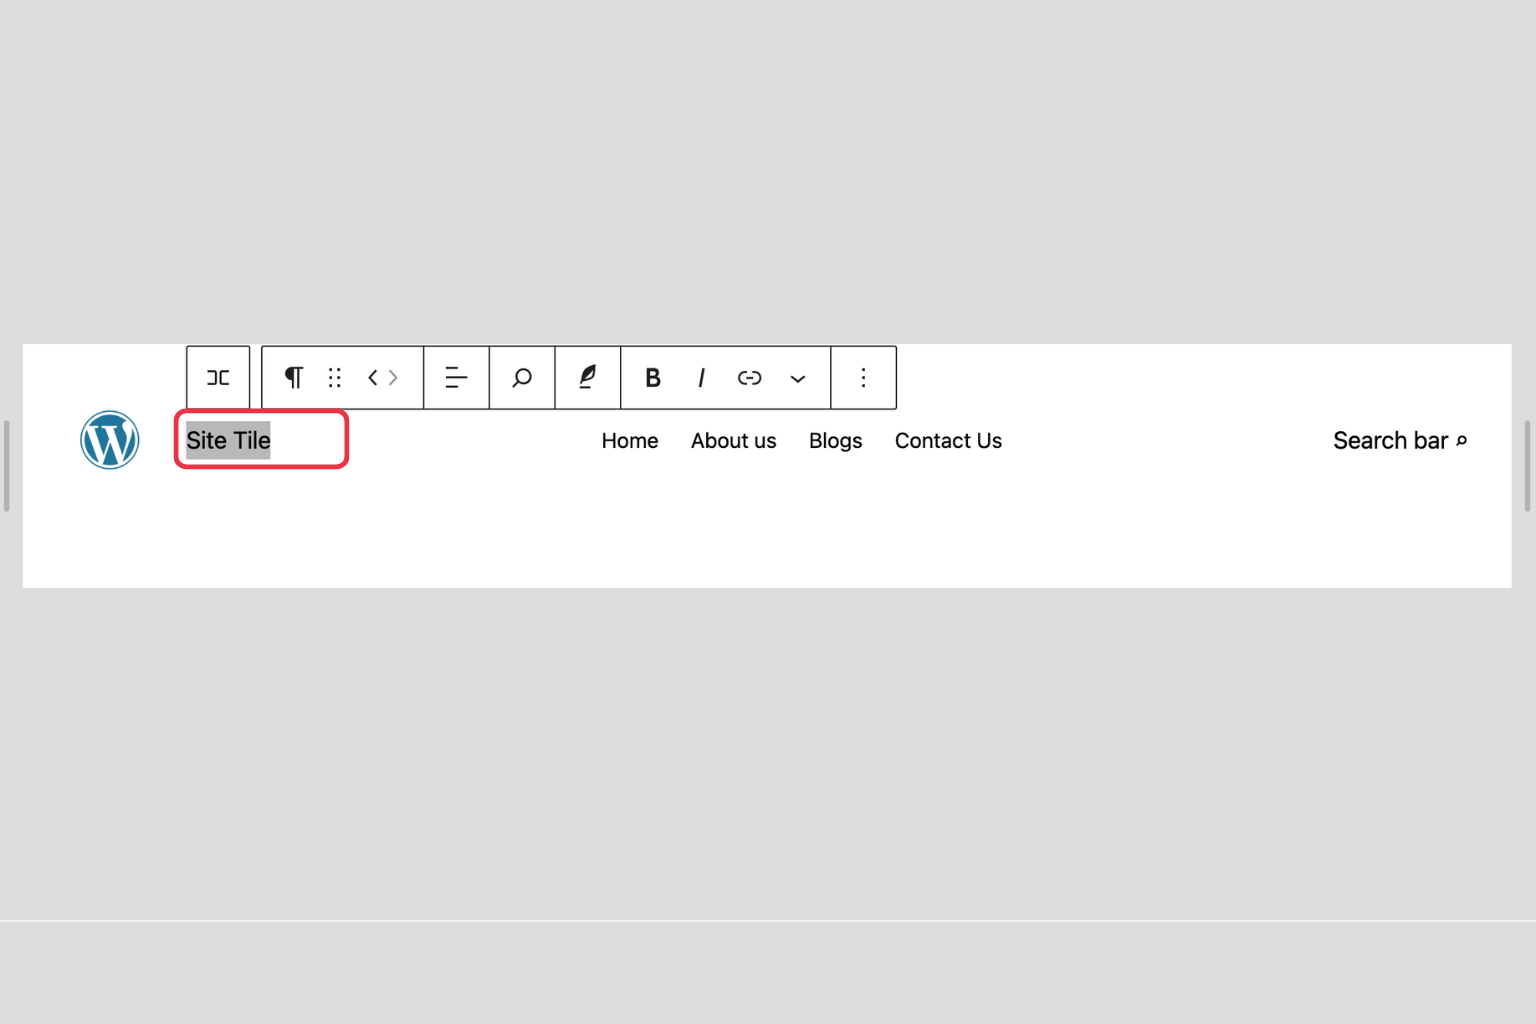
- Customize the typography, color, and size in the block settings.
To update the navigation menu:
- Click on the navigation block.
- Now, you can easily modify the menu items.
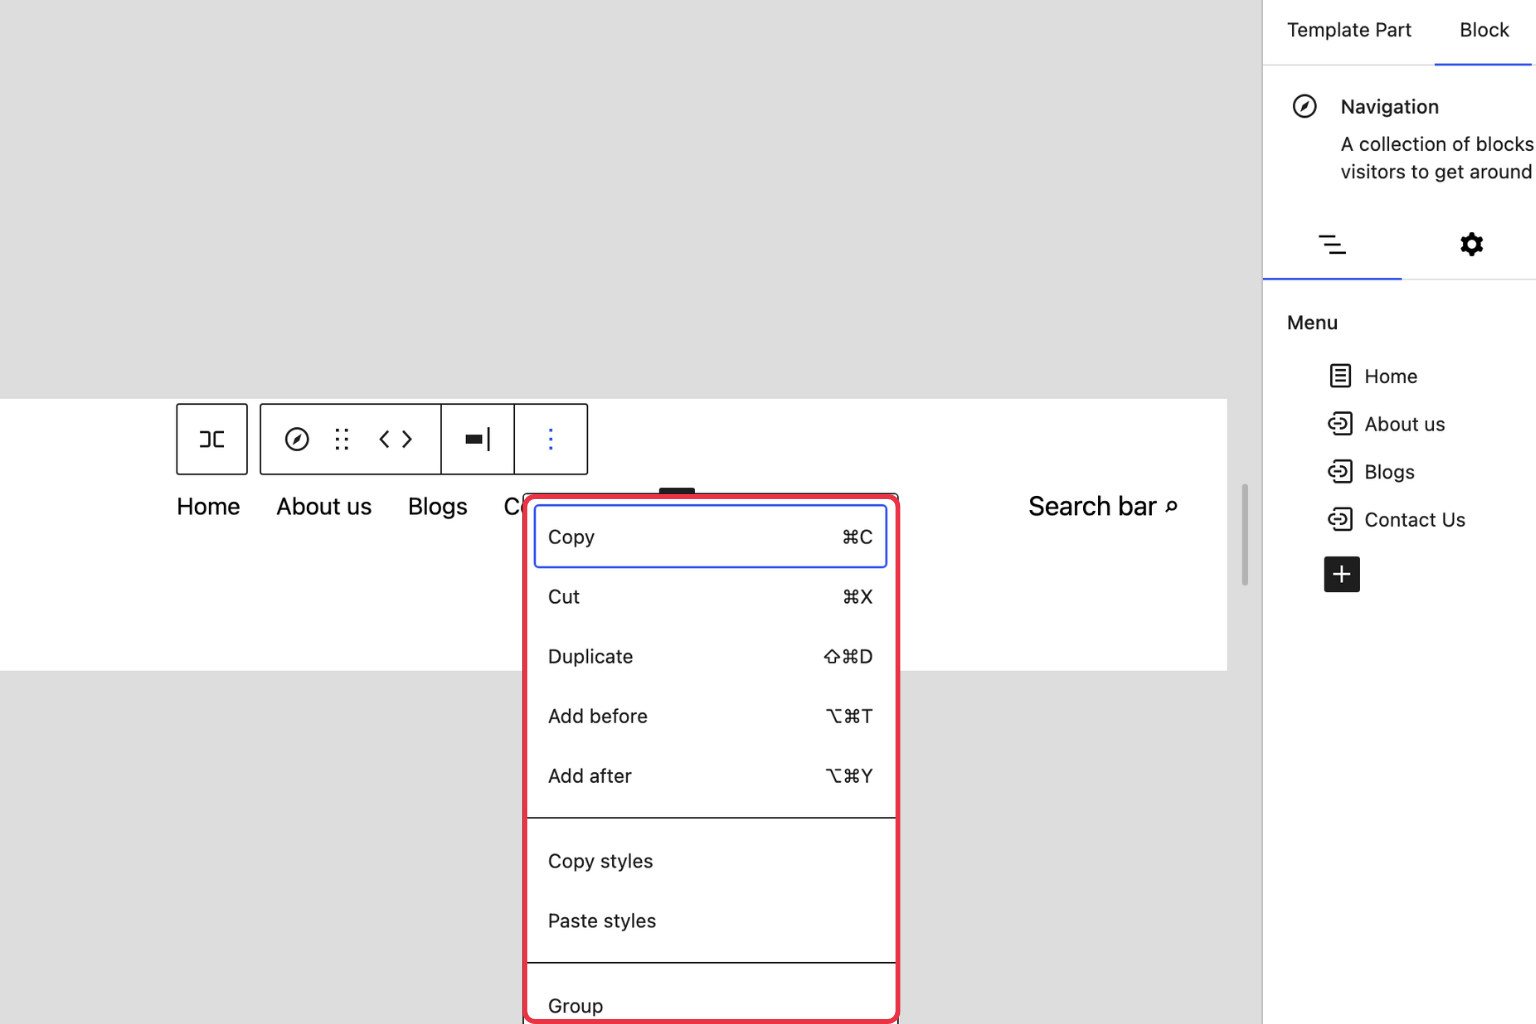
- Add, remove, or rearrange links as needed.
- Use the design options to style the menu.
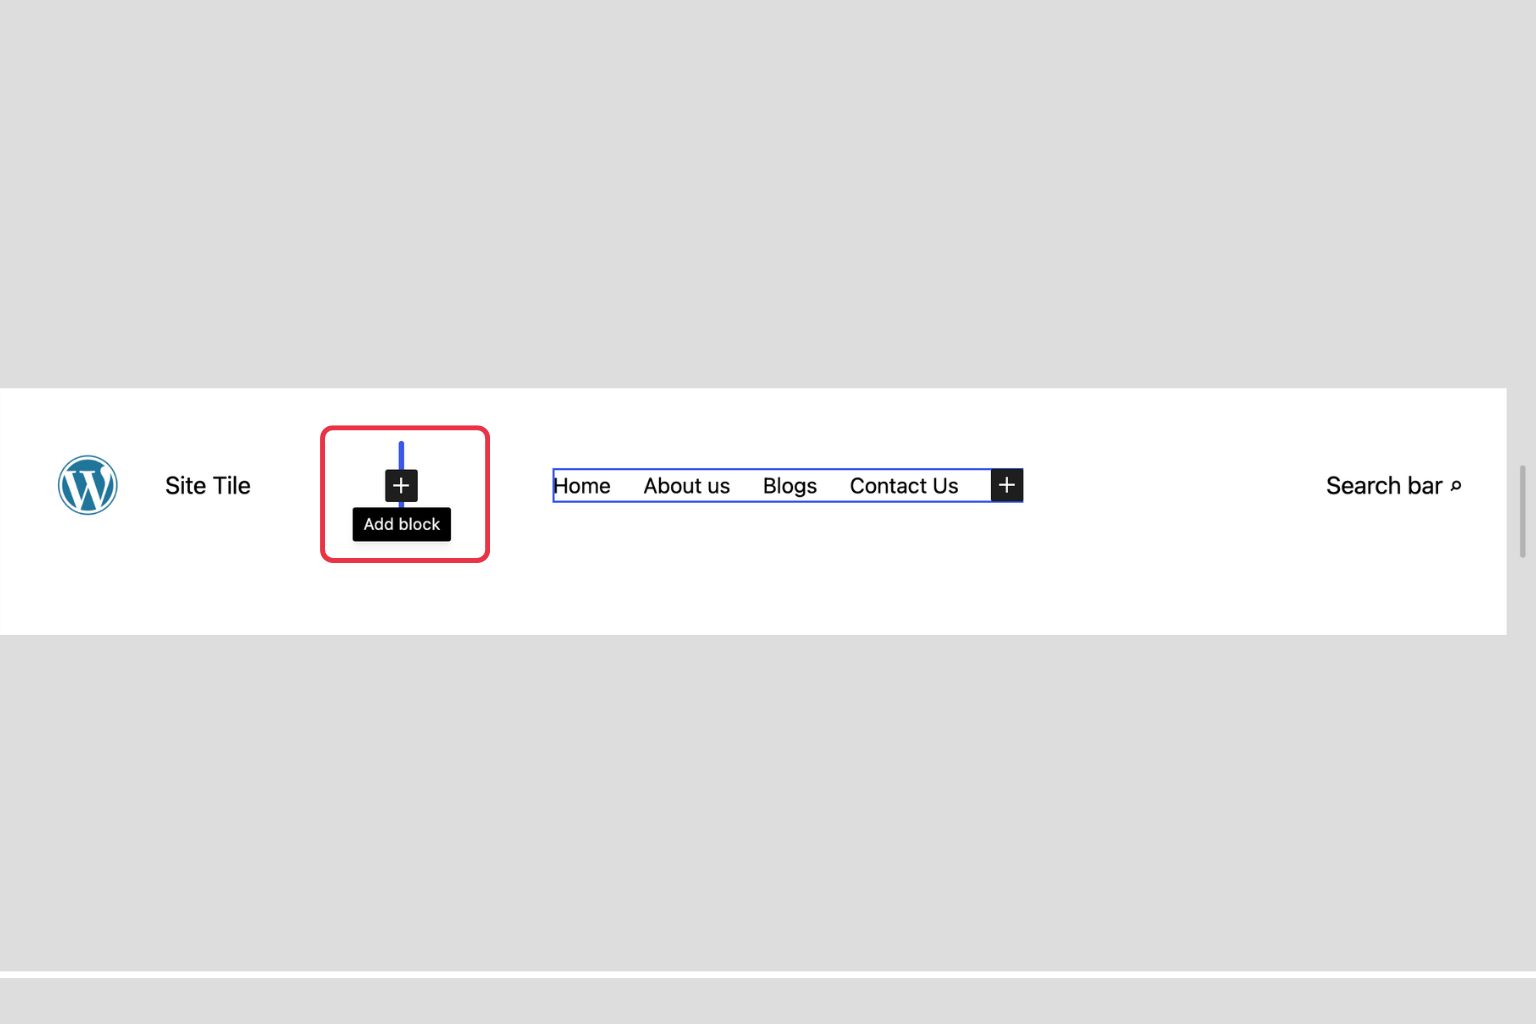
Step 4: Add New Header Elements
You can use the block inserter with the plus icon. This lets you add elements. Here is how you do this.
- Click the plus icon in the toolbar.
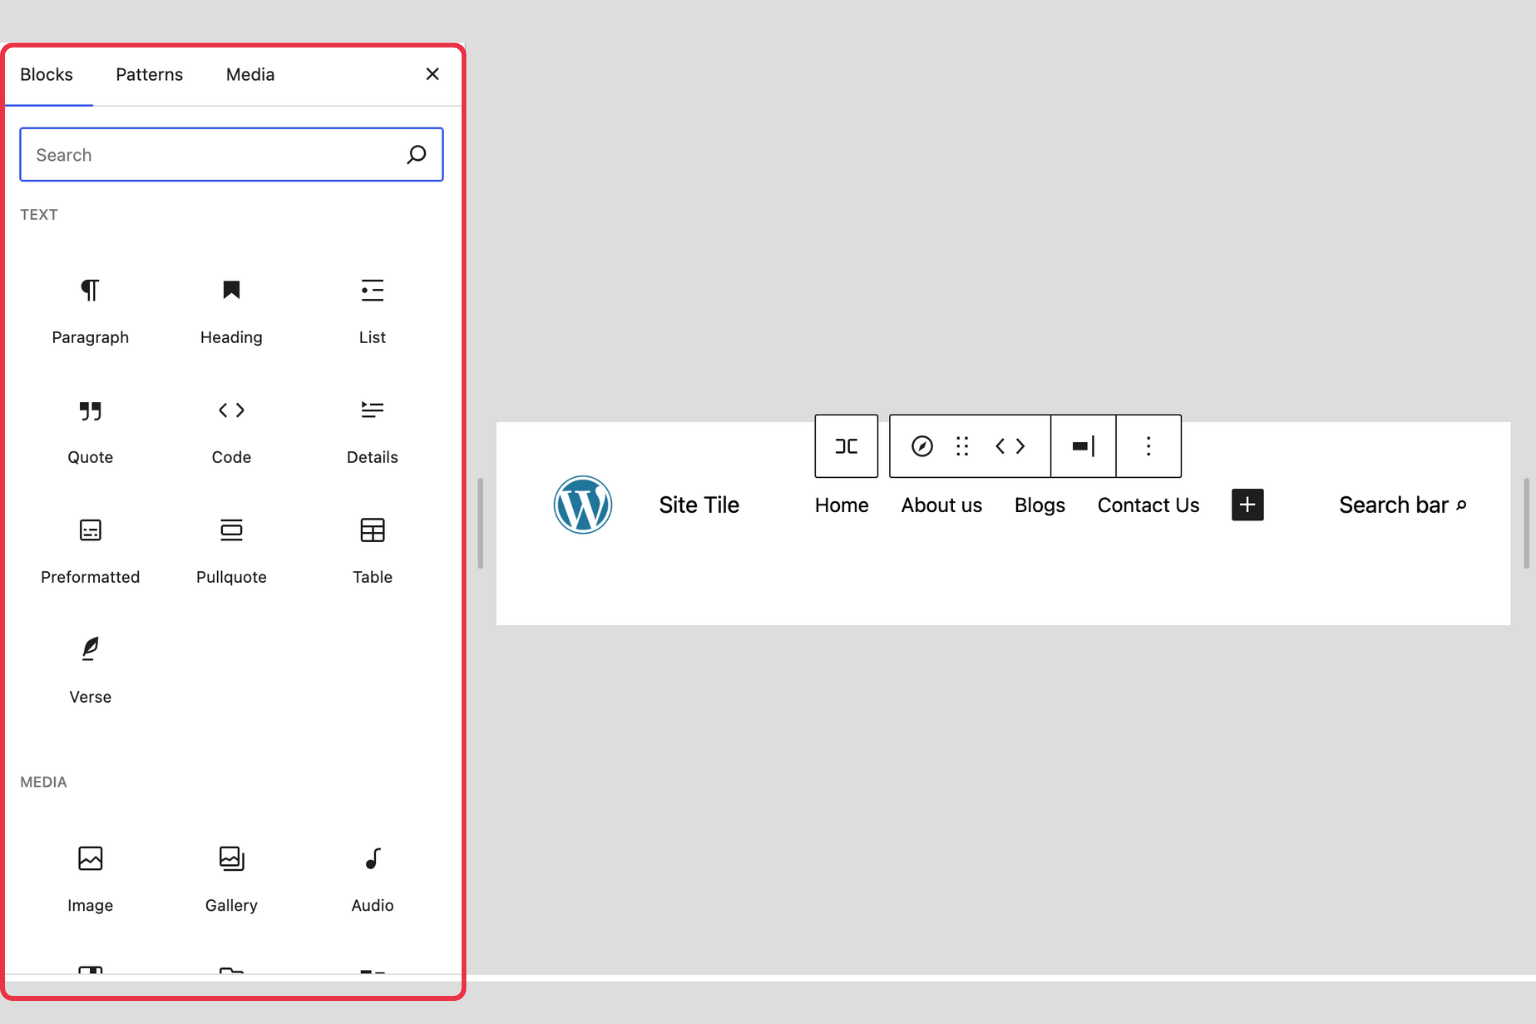
Add blocks like:
-
- Row block for horizontal layouts
- Social icons block for icons for social media
- Site tagline for your tagline
- Search block for site search
- Buttons for call-to-action links
Step 5: Arrange Your Layout
It’s simple to make layout adjustments using the site editor. Here is how you do it:
- Rearrange the blocks by dragging them.
- To view your header structure in list view, click the list icon.
- To create intricate designs, stack blocks inside of rows of blocks.
- Padding and margin controls allow you to adjust spacing.
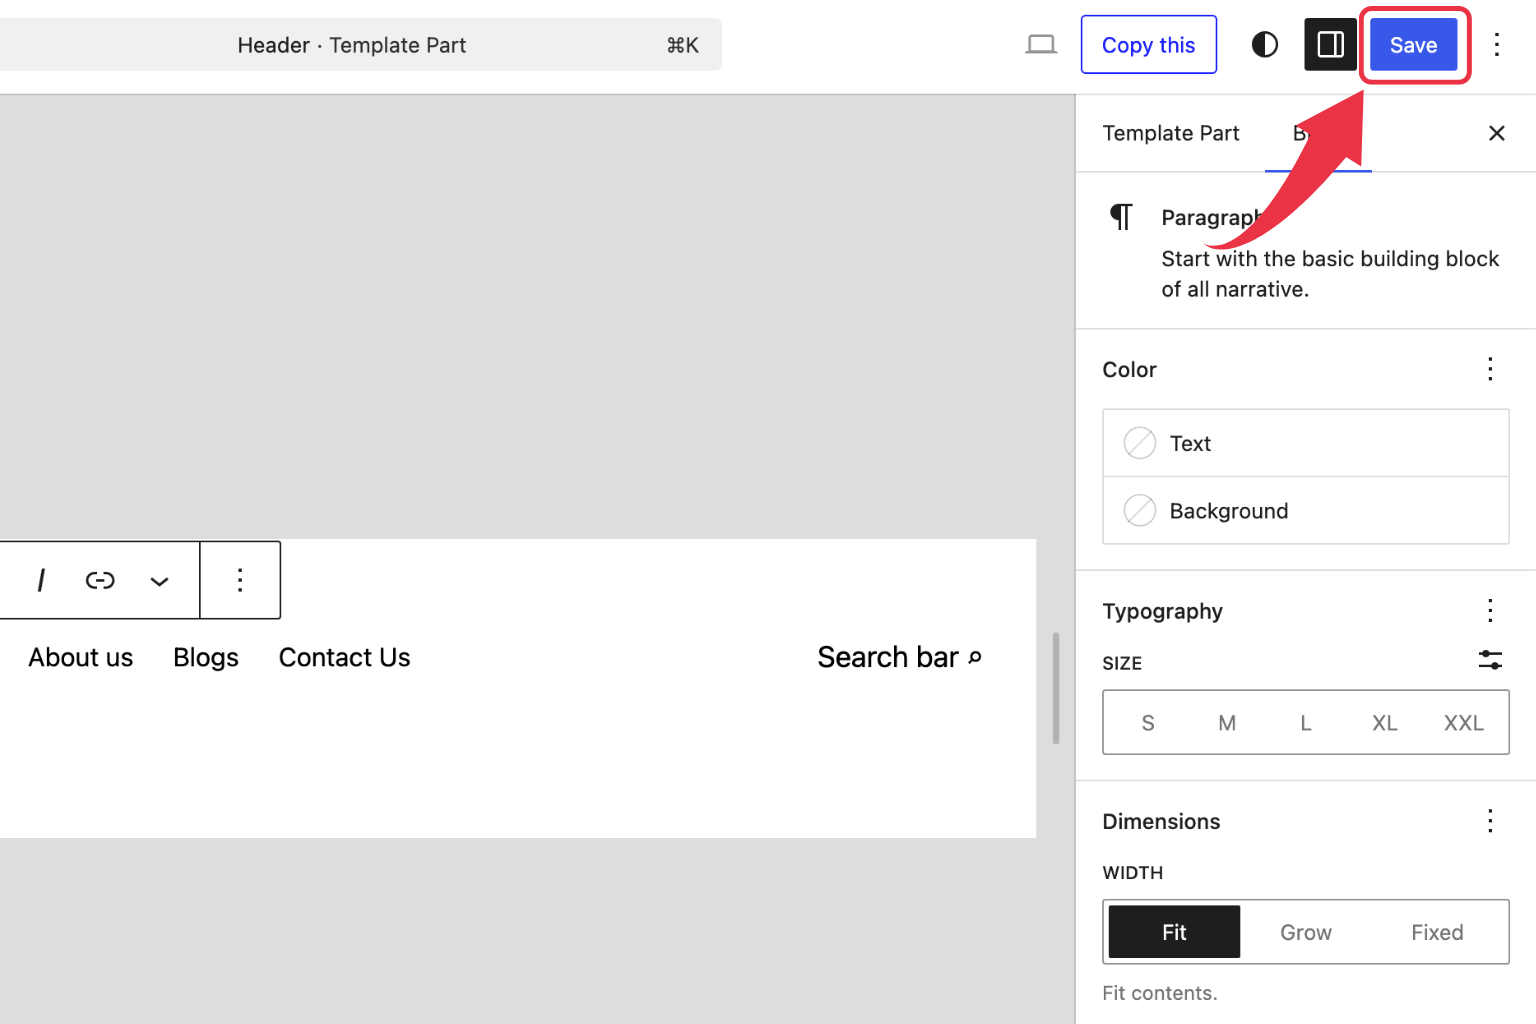
Step 6: Save Your Changes
After you have finished making your final customization, you should remember to save all your changes:
- Click Save in the top right corner.
Pro Tip: The site editor includes a feature known as live preview. This allows you to view changes in real time and finalize your adjustments.
How to Edit the Header Using the WordPress Customizer
The user with the classic theme needs to follow a different approach. You can customize your header using the default WordPress Customizer. If you want to make basic header customization, this method can be straightforward, simple, and perfect for your needs.
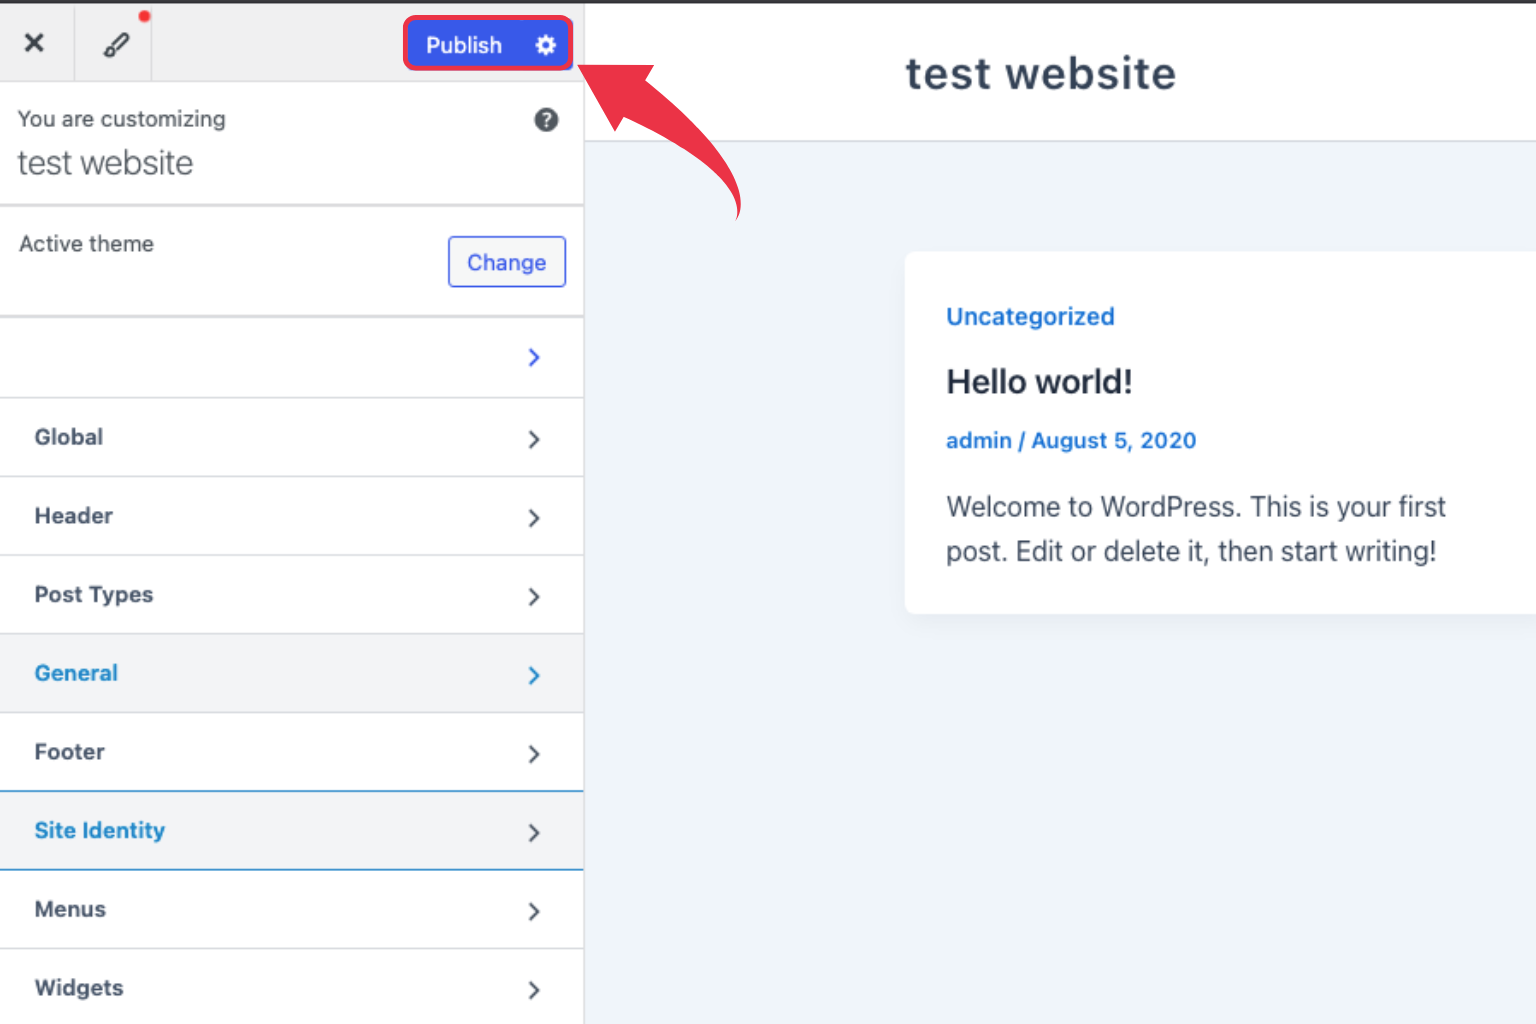
Step 1: Access the Customizer
- Go to your WordPress dashboard
- Click Appearance » Customize.
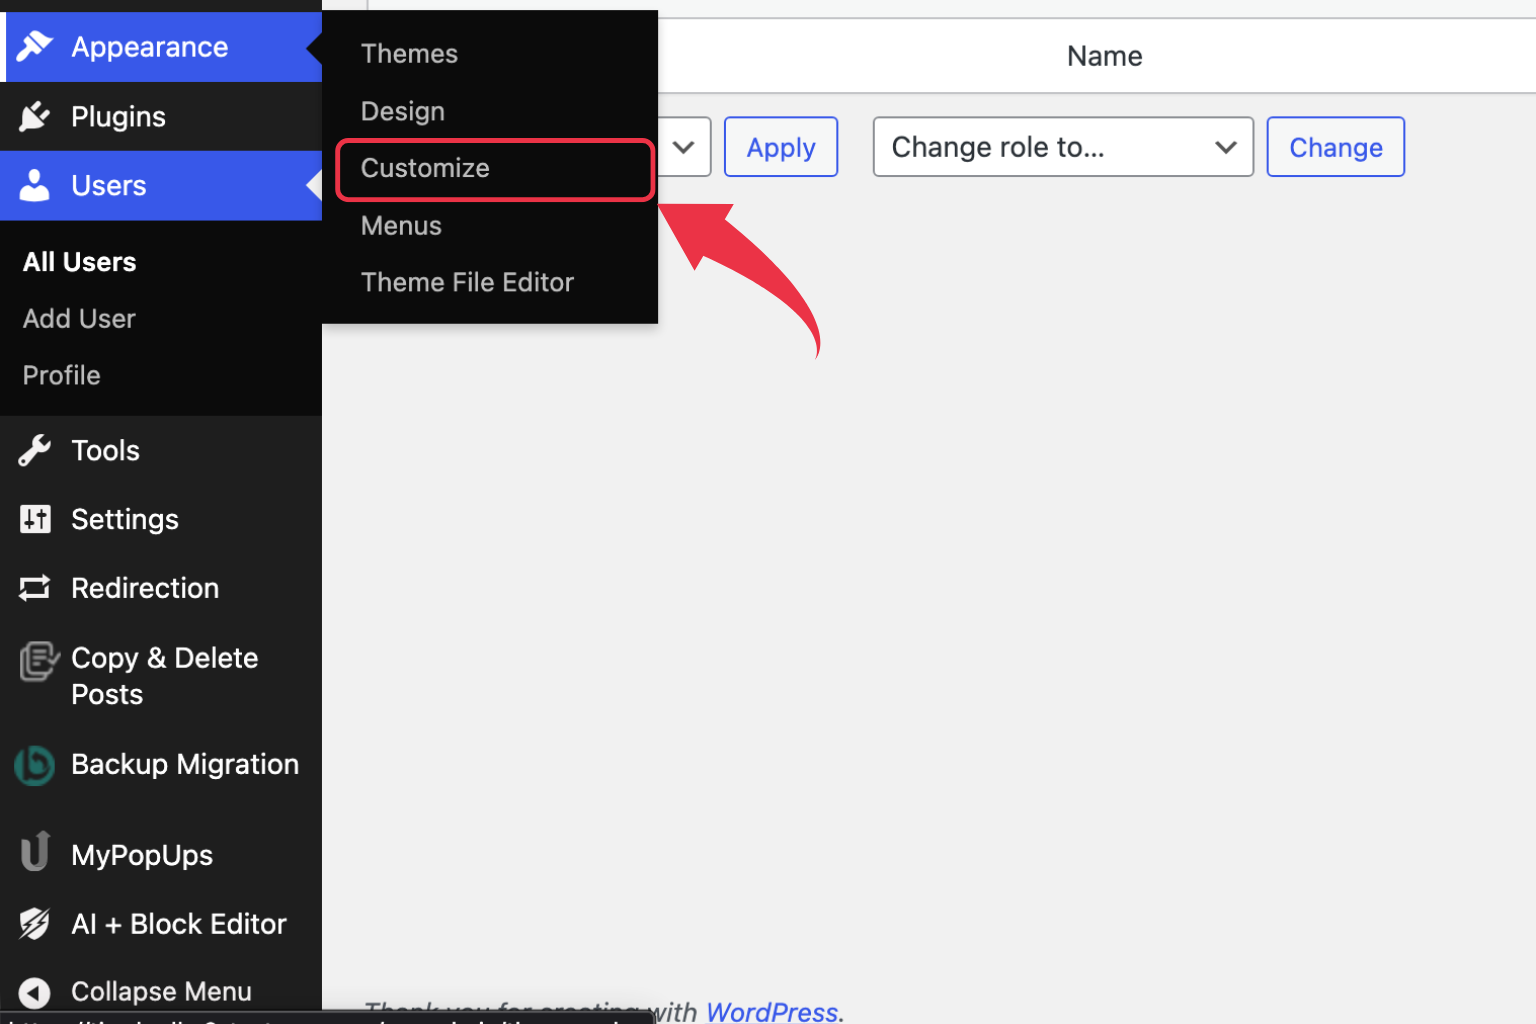
- The customizer opens with a live preview of your site.
Step 2: Access Header Settings
Look for these sections in the customizer:
There are many header settings; here are some specific sections you need to search for.
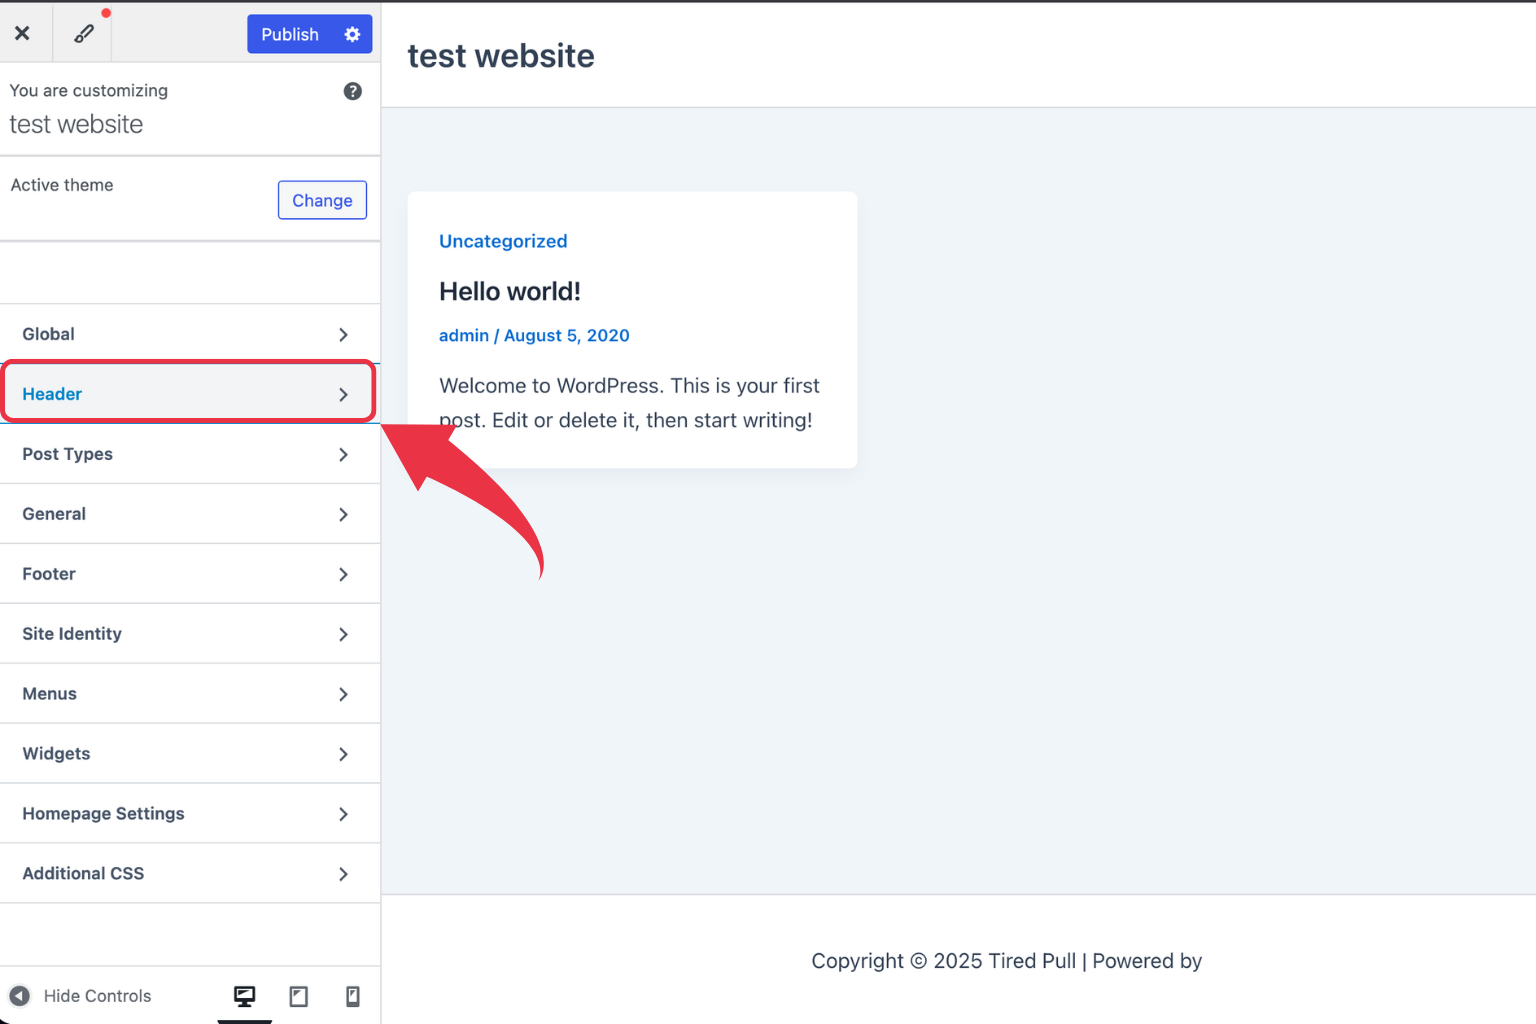
- Site Identity: Update your site title, tagline, and logo.
- Header Settings: Adjust the layout and options for your header; note that the location of these settings may differ depending on the theme you are using.
- Menus: Modify your WordPress menu and navigation settings.
- Colors: Adjust the colors and backgrounds of the header.
- Header Media: Upload header images or videos if your theme supports this feature.
Step 3: Customize Your Site Logo and Title
- Click Site Identity.
- To upload a logo:
- Click Select Logo.
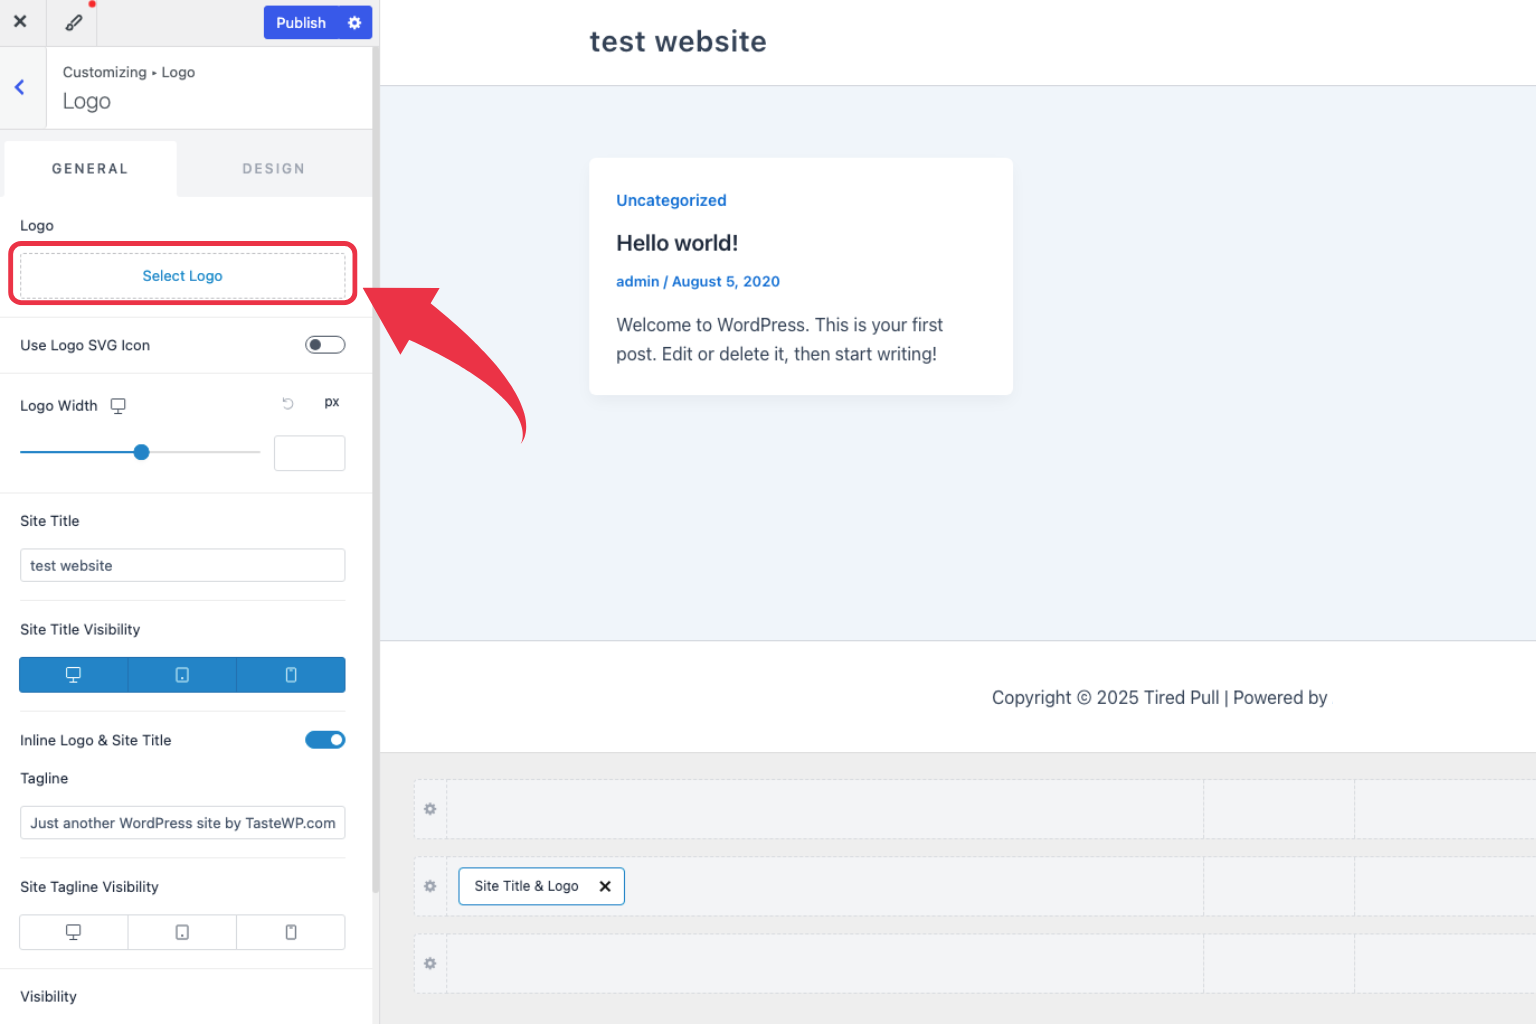
- Upload from your media library or computer
- Crop it if necessary.
- Click Select and then Publish.
- You can change your site’s title and tagline right in the text boxes.
- If you need to, change how visible something is.
Step 4: Configure Your Navigation Menu
- The customizer has menus that you can click.
- Pick where you want your header menu to go.
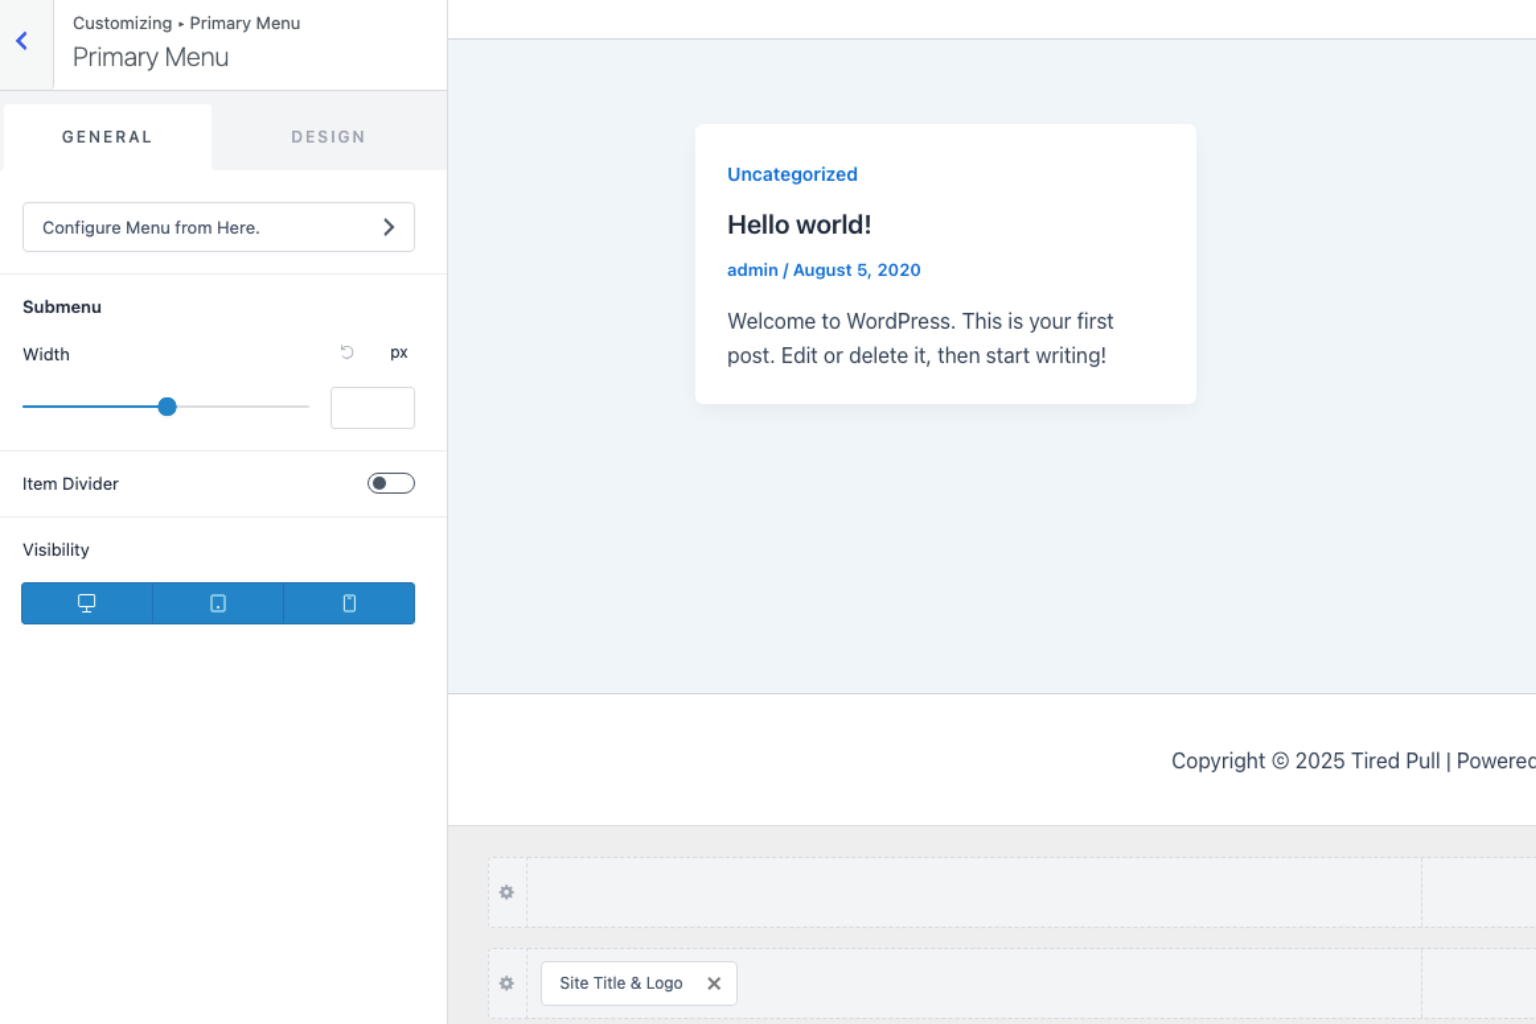
- Make a new menu or change an old one.
- You can add categories, pages, posts, or your own links.
- You can move things around by dragging them.
- Drag items a little to the right to make submenus.
Step 5: Adjust Header Layout
Many popular WordPress themes offer header customization. If your theme provides you with the features, here are adjustments you can make:
- Try to find Header or Header Settings.
- Pick one of the layouts that are available (this varies by theme).
- Some themes, like the Astra theme, give you:
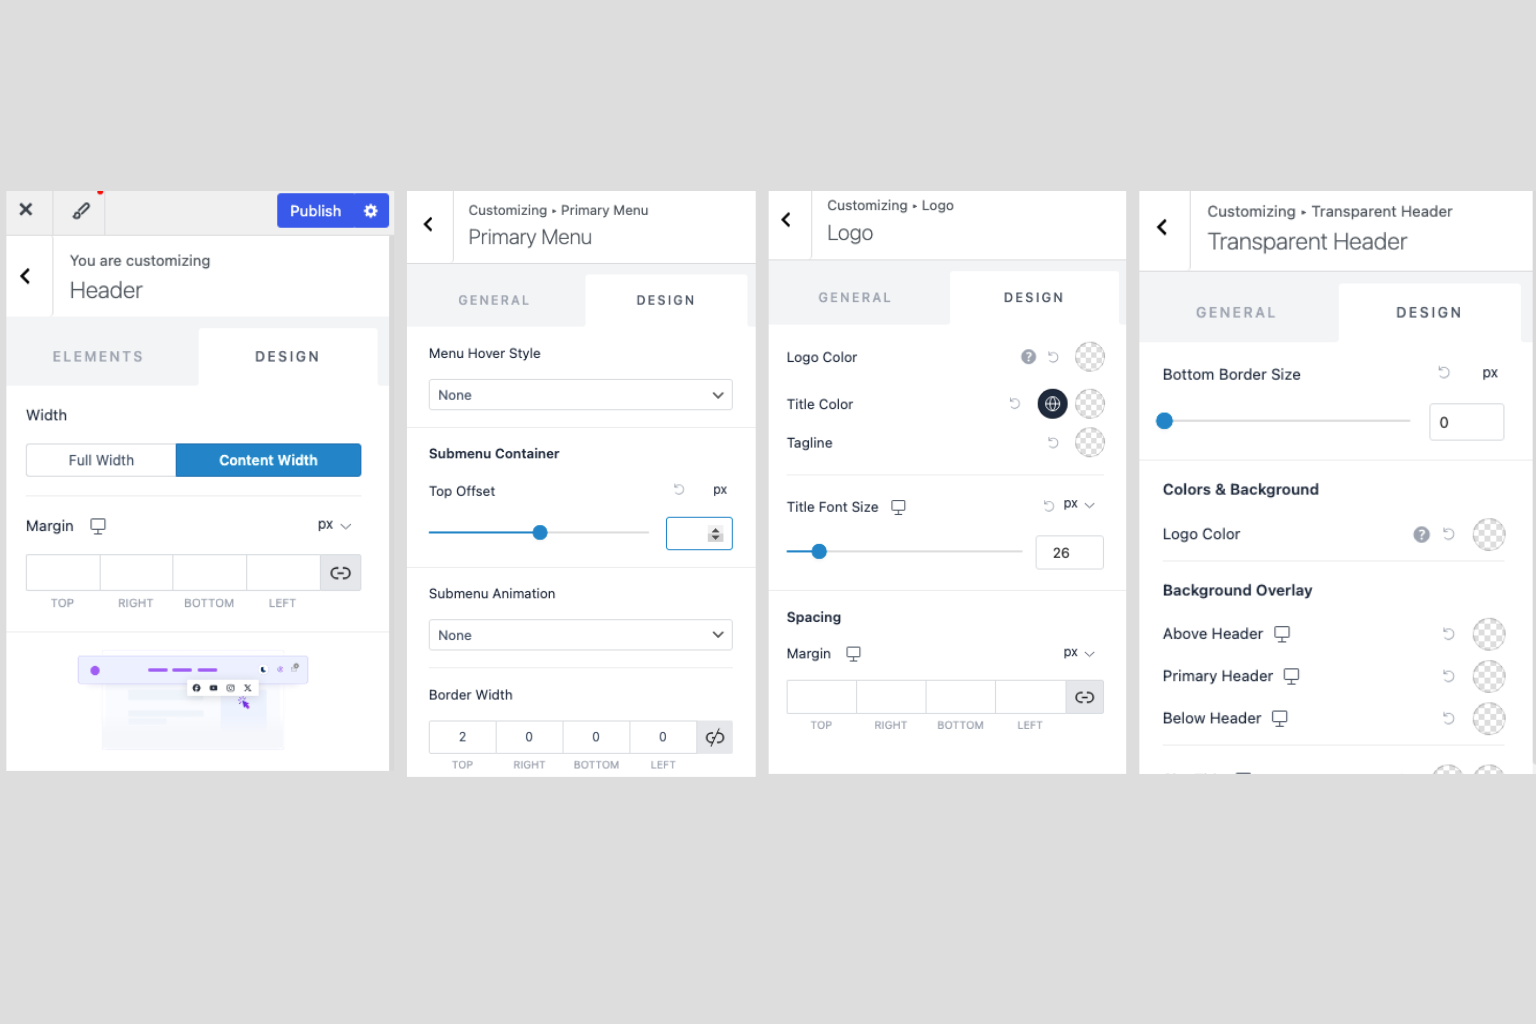
- Full-width or boxed layouts
- Logo position (left, center, right)
- Sticky header toggle
- Transparent header options
Step 6: Save the changes by publishing it.
- Watch how your changes look in real time.
- When you’re done, click “Publish.”
Pro Tip: Although the theme customizer provides limited options when compared to the site editor, it’s enough for any beginner and also supports most of the WordPress themes available on the WordPress Theme Library.
How to use Header Patterns for Quick Setup
Header patterns are the pre-designed layouts in WordPress. These patterns are easy to insert and customize. You can explore various visually appealing designs that provide a consistent look for your site.
Finding Header Patterns
- Navigate to the Appearance menu and select Editor to access the site editor.
- Click on the top part of your page.
- In the toolbar, look for the Replace button.
- Pick out a pattern.
- Header patterns can be looked at in the patterns tab.
You’ll find a variety of header pattern options, including:
- Simple logo and navigation layouts
- Headers featuring social media icons
- Headers that incorporate buttons and calls to action
- Full-width designs versus boxed designs
- Headers in either a single line or multiple rows
- Customizing a Header Pattern
After putting in a header pattern:
- Click on any element to edit it.
- Replace the example logo with your webiste logo.
- Update the site title block with your information
- Modify the navigation block links
- Adjust colors, fonts, and spacing
- Please remove any elements that are not necessary.
- Add additional blocks as desired
If you have just opened a website, these block patterns provide you with useful design options. professional layouts. You can change anything about the design, so you’re not limited to the default design.
How to Custom Header with Header Builders
It’s simple to create a custom header using Header Builders. You can build a custom header using different header builders, like Elementor, WPBakery, or any theme-specific header builder.
Popular Header Builder Options
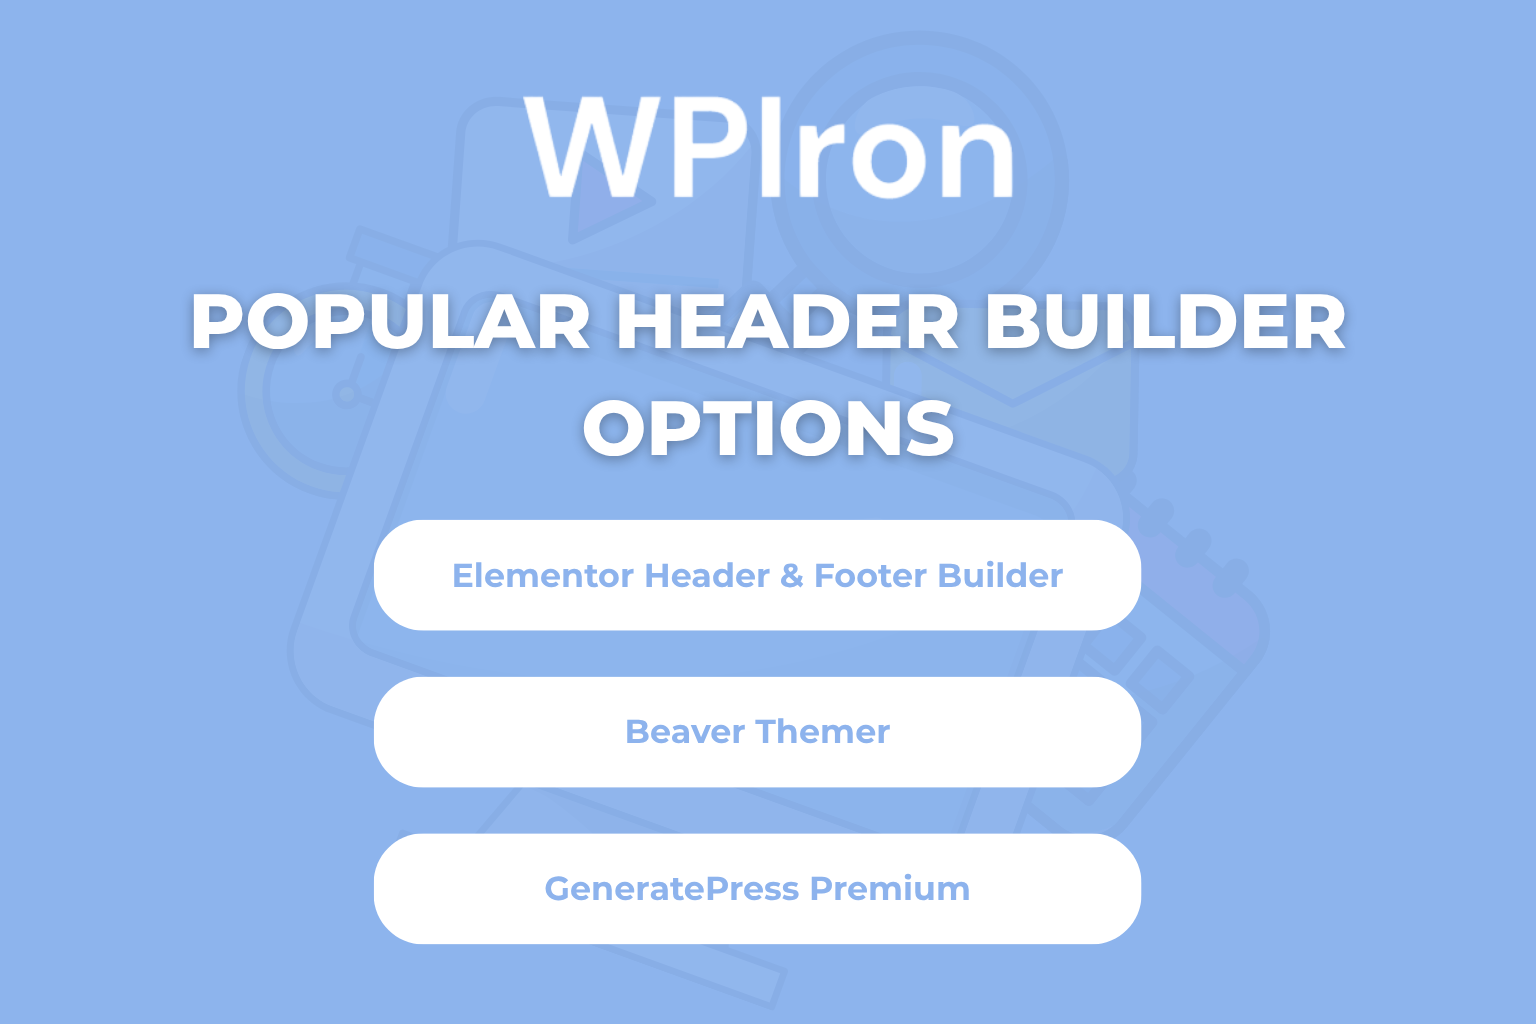
-
Elementor Header & Footer Builder
- Drag-and-drop interface that you can see
- Any theme from WordPress can be used.
- A large library of widgets
- Needs the Elementor page builder
Beaver Themer
- Fits in with Beaver Builder
- A system based on templates
- Good for making each page’s header different
GeneratePress Premium
- Built-in header builder known as Elements
- Lightweight and fast
- Ideal for creating custom layouts
Using a Header Builder: A Step-by-Step Guide
It’s important to use effective headers for your website, as it helps to attract the attention of your audience and enhance the overall structure of your content. Here are simple and easy steps to a header builder to create a site header:
Step 1: Install the Plugin
- Go to Plugins » Add New
- Search for your header builder that you like.
- Install and activate the plugin.
Step 2: Create a New Header template
- Go to the menu for the builder (this varies by plugin).
- Click on Add New Header.
- Provide your header template a name.
- Pick where to show it (the whole site, certain pages, etc.).
Step 3: Make your header.
- Add sections and columns to give the layout structure.
- Insert elements into the header:
- Add the logo widget from your media library.
- A widget for the navigation menu
- Icons for social media
- Search bars
- Custom HTML
Use the built-in design controls to change the look of each element.
Step 4: Configure Settings
- Change how the header works (sticky, transparent, etc.).
- Set up responsiveness for mobile devices
- If needed, add your own CSS.
- Set rules for when to display specific elements.
Step 5: Publish
- Check out your header on the front end.
- Make the last changes.
- Publish the final changes.
Header builders give you a lot of freedom and help you make complicated header layouts that you can’t do with the options that come with a theme.
Header Settings and Advanced Configuration
Your website’s header is the first thing people see and helps them find their way around. With header settings and advanced options, you can easily change how your header looks and works. This section will show you how to adjust your header’s style, layout, and features so you can make it fit your site’s needs and look great on any device.
Important settings for the header
Layout Options:
- Full-width: The header extends across the entire width of the browser.
- Boxed: Header is contained within a maximum width
- Custom width: Set specific pixel or percentage values
How to Enable Sticky Header
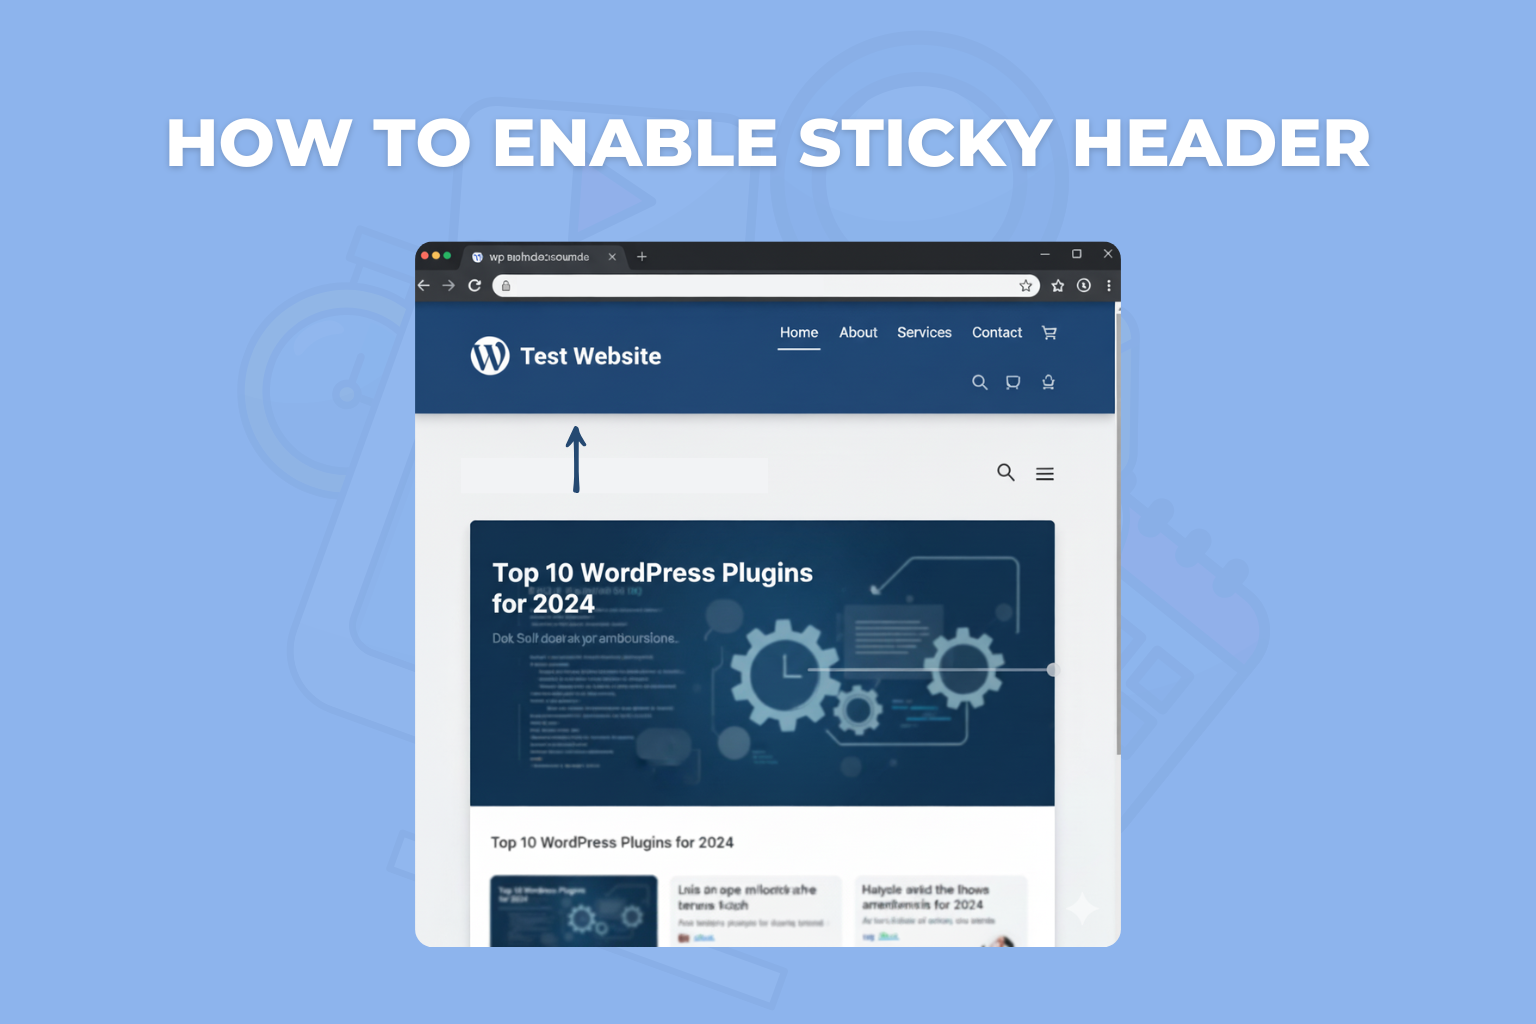
Sticky headers are the fixed headers that stay at the top even when you scroll down the pages. Here are ways to enable sticky headers using Site Editor, WordPress Customizer and custom code.
Using the Site Editor (Full Site Editing Themes)
Here are the simple steps you need to follow:
- Go to WordPress Dashboard » Appearance » Editor (or “Site Editor”).
- Select Templates or Template Parts from the left menu.
- Choose Header to edit your site’s header area.
- Click on the header block or group you want to make sticky.
- In the block settings panel (right side), look for Position or Sticky options.
- If available, set the position to “Sticky” or “Fixed to top.”
- Click Save to apply changes.
Important Note: All the block themes don’t support sticky headers by default, but you can still use custom CSS code to manually enable the sticky header in any website.
Using the Theme Customizer (Classic Themes)
Here are the steps you should follow if you are using the traditional Customizer:
- Go to WordPress Dashboard » Appearance » Customize.
- Look for a section called Header, Header Options, or Menu.
- Locate the Sticky Header or Sticky Menu option, which may be a checkbox or toggle.
- Enable it.
- Click Publish to save.
Important Note: If you are unable to identify the exact setting at the specified location, you should understand that these settings may vary with themes. If you don’t find these options, the theme you are using may not support sticky headers directly.
Using Custom Code (CSS Method for Both Editors)
If you are unable to find the setting mentioned in the prior guide, you may need to manually add codes to enable sticky headers:
- Go to Appearance » Customize » Additional CSS
- Add the following CSS (replace .site-header with your header’s actual class/ID):
.site-header {
  position: sticky;
  top: 0;
  z-index: 999;
  background: #fff;
}- Use browser inspector to find your header’s class (e.g., .main-header, #header).
- Finally, publish or save the changes.
How to Enable Transparent Header In WordPress
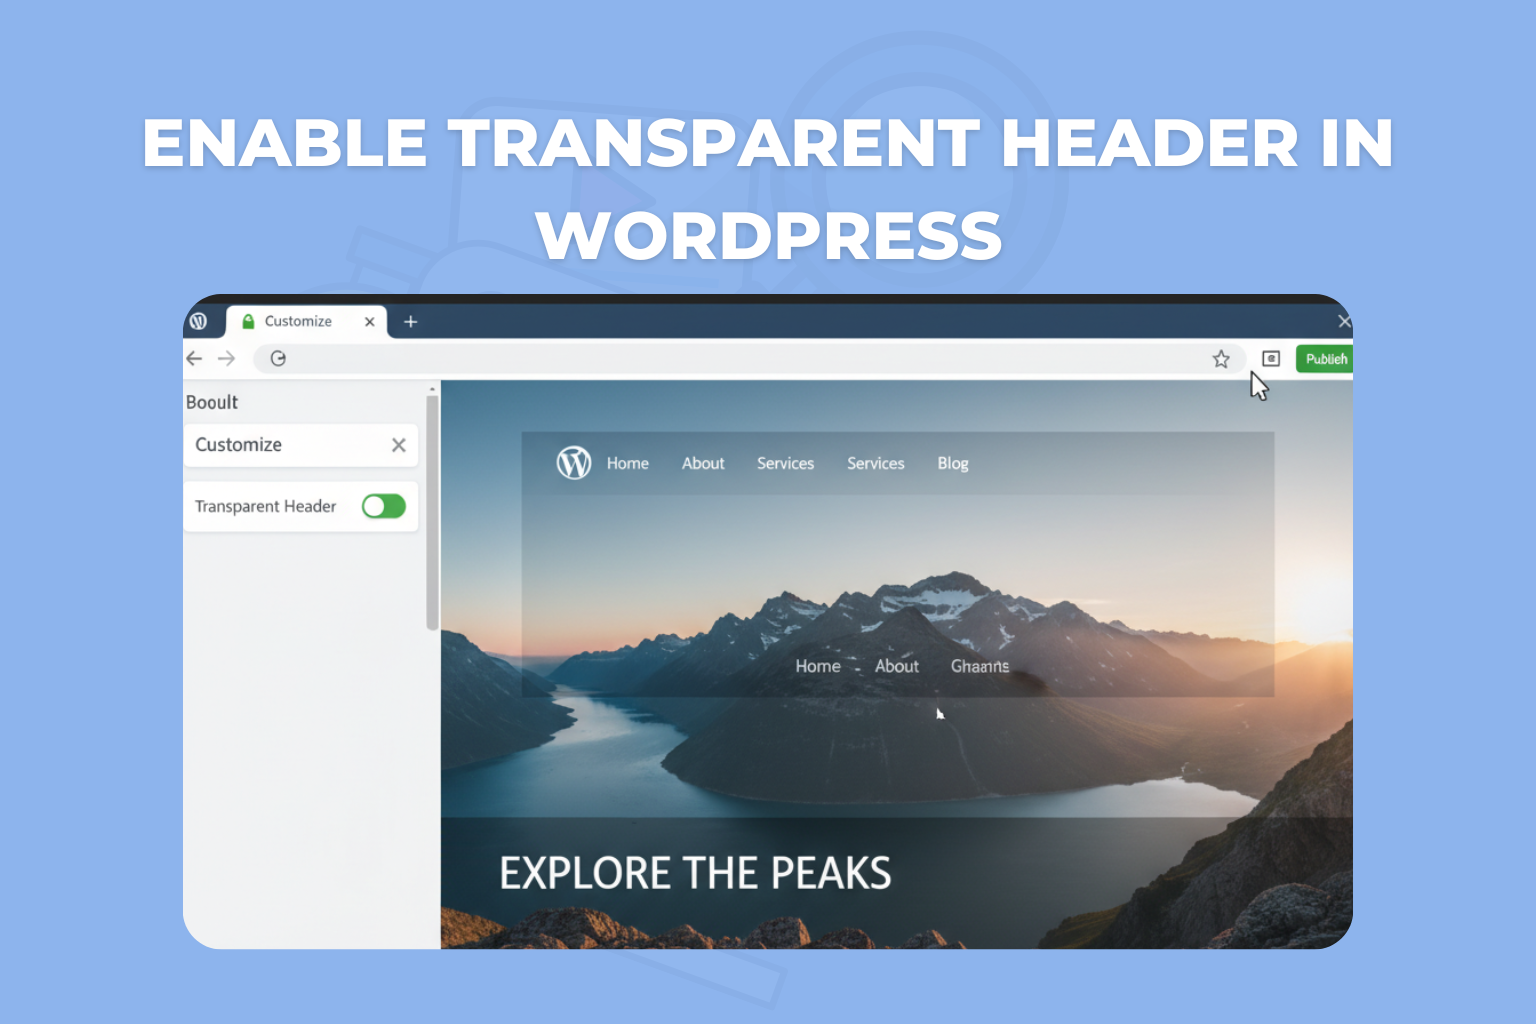
A transparent header is a type of website design in which the area in the top (which usually has the logo, navigation menu, and social links or buttons) doesn’t have a solid background color.
You can enable your transparent header by using these ways:
- Theme header settings
- Page builder options
- Custom CSS
Enable Transparent Header with Custom Code
- Go to Appearance » Customize » Additional CSS.
- Add the following CSS, replacing .site-header with the following code:
.site-header {
  background: transparent !important;
  position: absolute;
  width: 100%;
  top: 0;
  left: 0;
  z-index: 999;
}- Make sure that the text, logo, and menu in your header can still be seen above your page background or hero image. You may need to change the color settings for logos and links to make them stand out more.
- Publish your changes.
How to Enable Mobile Header In WordPress
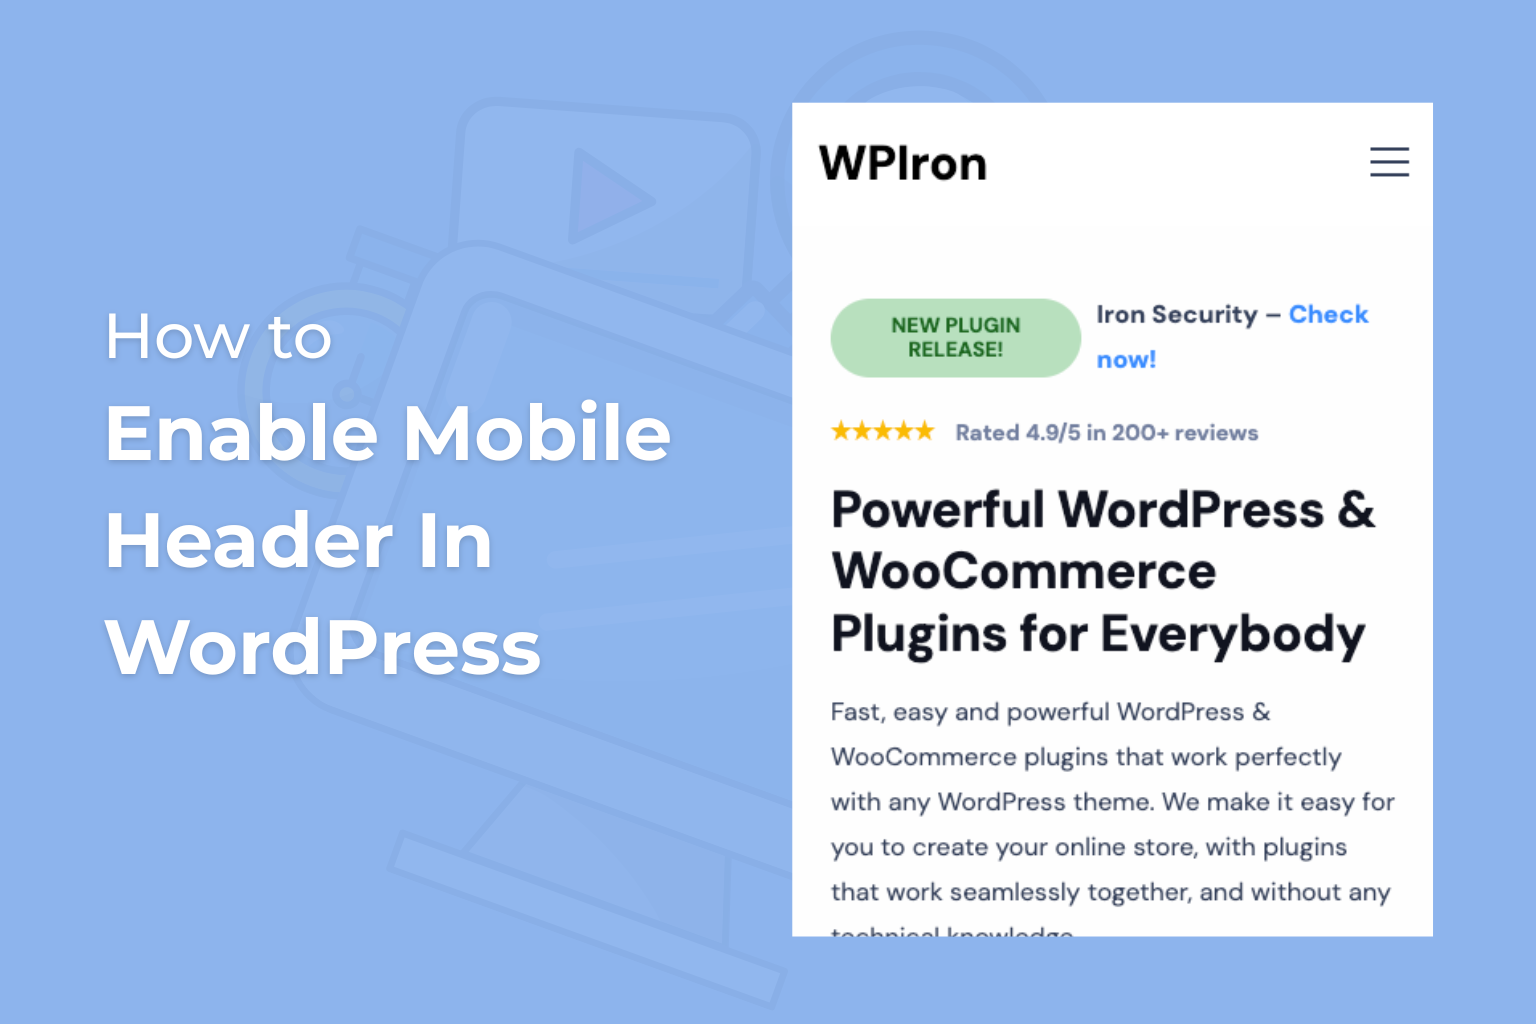
What is a Mobile Header?
Mobile headers are the responsive headers that can adapt with the screen size changes from web to mobile or tablet devices. These headers contain the following elements:
- Website logo or site title
- Hamburger icon “☰” for Navigation menu
- Contact icons (phone, email)
Why is the Mobile Header Important?
The mobile header is important for any website. In today’s world, most of the websites are interacted with using a smartphone or tablet. Therefore, the consistent design of your website must not be limited to computer users. Here are some points that clearly explain the importance of the mobile header:
- Improve the first impressions when a user visits your website
- Helps to quickly navigate through the different pages
- Improves the brand’s visibility.
- Contribute to providing the best user experience
- With responsive design, your website adapts to different screens.
Real life examples of Mobile Header
Here are some real-life examples of mobile headers and why they are important:
- Online shopping: Your website should have a visible cart or search option. This option enables buyers who visit your store to easily find the product and also add the products to the cart.
- Restaurants & cafes: If you own a restaurant or cafe, you should add an option of a Menu or Call Now button. This helps customers to instantly place orders or book a table.
- Travel & rider sharing apps: If you own a travel or ride-sharing application, you can add “Book Now” or “Find Ride” in the header to save time for users.
- Hospitals & clinics: “Emergency Call” or “Appointment” are the necessary calls to action that can be added in the mobile header. This can literally save lives.
There are many other examples, like students can use “Apply Now” or “Contact Us,” and banking apps can add “Quick Login” options. The possibilities are beyond imagination.
Enable Mobile Header In WordPress
Most modern WordPress themes support mobile header options by default. If you are using one of them, you can use these steps:
- Go to WordPress Dashboard » Appearance » Customize.
- Now, search for Header or Mobile Header settings.
- Finally, enable it. Here, you can customize necessary elements, like the logo, menu, search bar, and buttons for mobile devices.
If you are using a theme that doesn’t support mobile headers, you can’t customize the mobile headers. There are many header builder plugins that can help you in these situations.
Troubleshooting Common Header Issues
Issue #1: Header Changes Not Appearing
Problem: A user made necessary changes to the header, but it looks the same.
Solutions:
- Clear cache: Here you should clear the cache of your browser and reload your site.
- Hard refresh: Press Ctrl+F5 for Windows and Cmd+Shift+R for Mac devices.
- Check you saved:Ensure you clicked Save in the site editor or Publish in the theme customizer.
- Verify the correct header:Make sure you edited the active header template.
Issue #2: Issues with Logo Size
Problem: The logo for your site looks too big or too small.
Solutions:
- In the site editor: In the settings, click on the logo block and change the width.
- In the customizer: Certain themes allow you to adjust the logo size.
- Resize the image: You can change the picture in your media library before you upload it.
- Use this CSS code:
.site-logo img {
    max-width: 200px;
}
Note: 150px to 400px wide is a good range for most headers.
Issue #3: Navigation Menu Not Working
Problem: The menu is missing, or the links are not working.
Solutions:
- Create a menu: Go to Appearance » Menus, and create a menu with items.
- Assign to location: Assign your menu to the header location in either the customizer or the menu settings.
- In the block editor: Select the navigation block, then click on “Select Menu” to choose your desired menu.
- Check mobile view: Make sure that the menu looks good on phones.
Issue #4: Header Breaks on Mobile
Problem: The header layout appears to be broken on mobile devices.
Solutions:
- Preview mobile view: Use the device preview in the site editor.
- Adjust spacing: Reduce padding and margins for mobile
- Stack elements: Change row blocks to stack vertically on small screens
- Hide elements: Use responsive visibility controls to hide non-essential items.
- Check logo size: Ensure the logo isn’t too large for mobile.
- Test navigation: Verify the WordPress menu changes to a hamburger menu “☰”.
Issue #5: The header overlaps with the content
Problem: The header is overlapping the content on the page below it.
Solutions:
- Check sticky settings: If the sticky header is causing issues, consider disabling it.
- Add padding: Increase the top padding of your page content to prevent overlap with the header.
- Adjust header height: Adjust the header height in the settings.
- Fix position issues: If you are using custom code, verify the CSS position properties.
Issue #6: Customizer Options Missing
Problem: In the customizer, you can’t find the header options.
Solutions:
- Wrong theme type: The customizer is not used by block themes; the site editor is to be used instead.
- Theme limitations: Some minimal themes provide limited customization options.
- Check theme documentation: Look for header settings specific to your theme.
- Consider a different theme: Switch to a theme that offers more customization options, such as the Astra theme.
Issue #7: Custom Code Not Working
Problem: Your custom CSS or JavaScript is not being applied.
Solutions:
- Check for errors: Check your code for mistakes in syntax.
- Specificity issues: You may need to use more specific selectors in your CSS.
- Cache problems: Clear all caches after adding new codes.
- Wrong location: Ensure that you have placed the code in the correct location.
- Inspect element: To fix bugs, use the browser developer tools.
Conclusion
Editing your WordPress header is easier than ever. Depending on your theme, you can use full site editing with block themes, the classic theme customizer for simpler changes, or the header template part for advanced layouts.
Start by checking your theme type, then click edit on the header section. Use the site logo block, navigation, and patterns to match your brand. In list view, it’s simple to adjust or reorganize elements. Even if your theme offers fewer options, you can still create custom headers or extend them with custom CSS.
Your site’s header appears on every page, so make sure your template part is clean, with a professional logo, organized menus, and elements that help visitors. For beginners, stick to the built-in tools; as you grow, experiment with patterns and advanced builders to create content that stands out.
With WordPress, your header can be as simple or advanced as you need—small tweaks or complete redesigns both leave a strong first impression.
Securing WordPress
Protect Your Site from Botnets, Malware, and Hackers
Fequently Asked Questions
What is a WordPress header and why is the site's header so important?
The WordPress header, or any website header, is the section that is at the top of your website. This part of the website serves as the starting point and contains all important information, such as the menu, website logo, navigation options, and any key actions relevant to a specific type of website.
How can I edit my WordPress header using the header template part?
It’s simple to edit your WordPress header. You can go to the site editor and select the header template part. In this setting, you add, remove, or arrange your elements.
Can I use the block inserter to create custom headers in WordPress?
Of course, you can utilize the block inserter in the site editor. You can use this feature to add different blocks, such as images, menus, or buttons, or even create a custom header.
How do I use list view to manage my site's header structure?
The list view shows all the blocks in your header. You can use it to easily select, move, or edit different parts of your header’s structure.
What should I do if my site's header overlaps with the page content?
If you header overlaps the page content, try adjusting the layout of your content to ensure everything fits correctly. Additionally, you might want to consider using different header styles or sizes to create a better visual balance on the page.
How do I enable a transparent WordPress header?
To enable a transparent header, you need to adjust the CSS settings for your website. This will typically involve setting the background color to transparent and ensuring that any overlaying elements still maintain readability.
How do I troubleshoot when header changes don’t appear in the header section of my WordPress site?
If header changes don’t show up, it could be due to caching issues. Make sure to clear your cache and refresh the page, or examine the server settings to ensure that the updates are being applied correctly.